Night Vision Troubleshooting Guide: Common Issues and Field Solutions
Night vision problems come in two broad types: user-correctable issues, and actual equipment problems requiring service. Fogged lens, loose helmet mount, blurry image, weak IR performance, poor battery contact, and battery failure can typically be solved in the field. However, shading, edge glow, constant flickering, bad contacts, corrosion, or an always-visible bright point usually indicates your night vision requires professional attention.
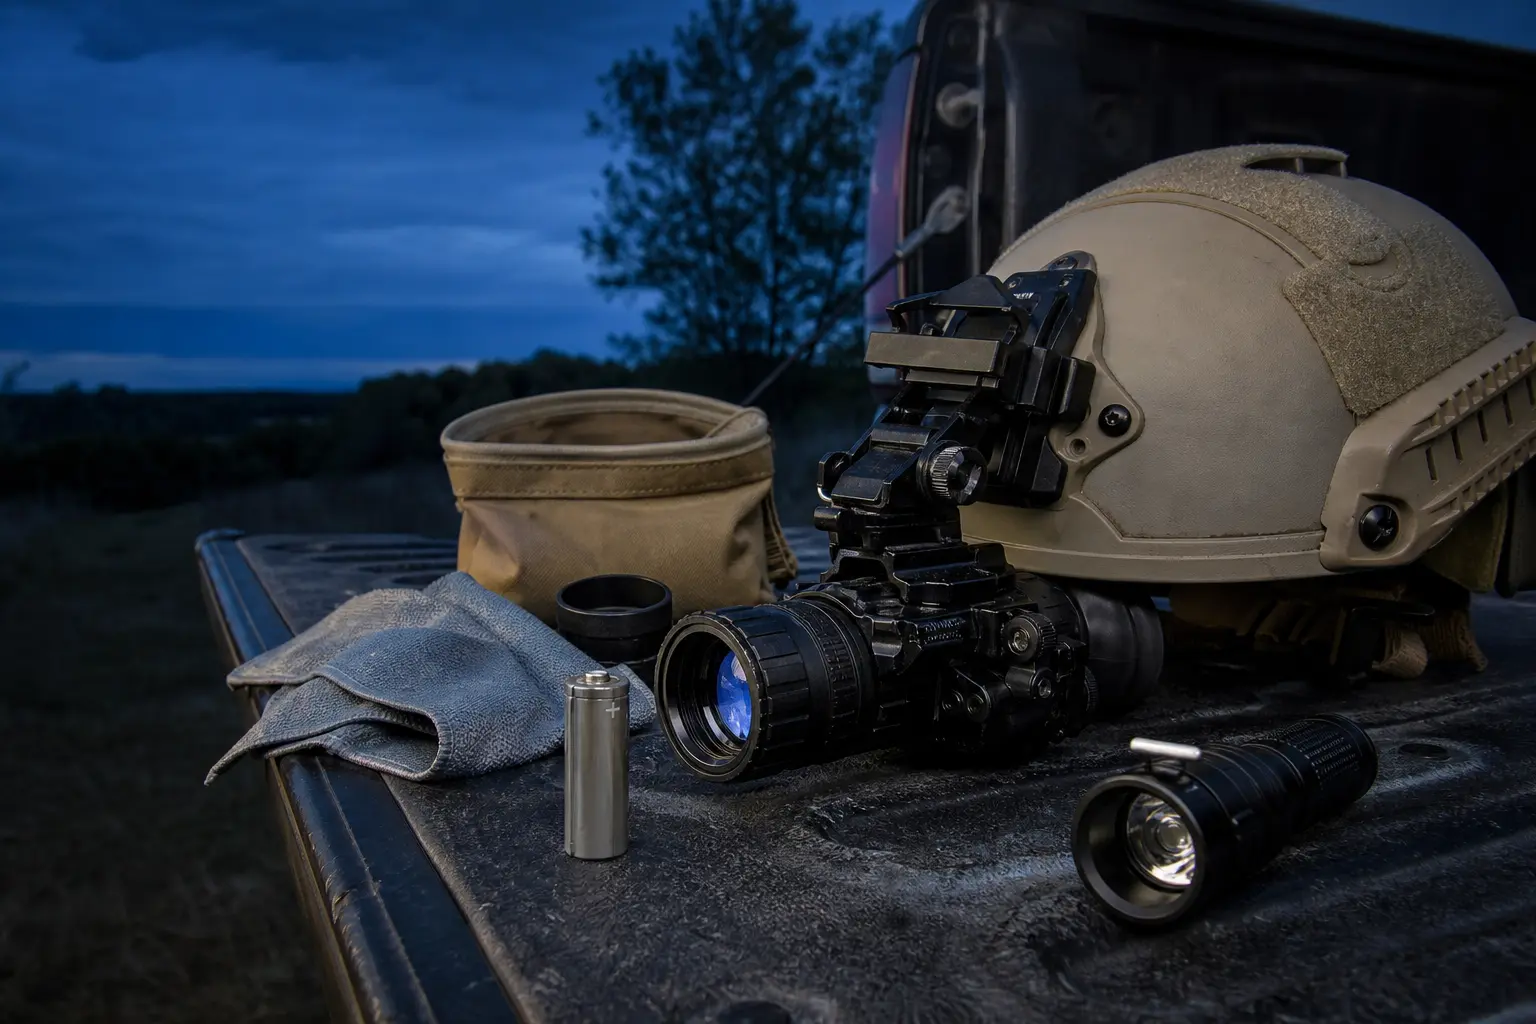
This guide covers analog night vision troubleshooting tips for monocular devices like the PVS-14, binocular night vision goggles, or night vision sights. Always follow the manual specific to your device whenever troubleshooting night vision.
Safety Rules for Safe Troubleshooting Before You Start
Do not aim analog night vision directly at bright light sources including headlights, street lights, lasers, lanterns, or any open flame. Specifically, AGM’s PVS-14 user manual warns that the unit is an optical instrument, and must not be aimed at bright light sources.
Use the objective lens cap to conduct functional tests in daylight. For example, several PVS-14 manuals describe high-light cutoff tests performed with the lens cap attached, not bare optics exposed to sunlight.
Do not attempt to open the housing to clean the tube, remove spots, or fix anything else in there. Opening your device can void the warranty, affect purge, expose internal components to dust or moisture, and make your existing issue worse.
Remove batteries from the unit prior to long-term storage. Military and manufacturer manuals consistently recommend battery removal and battery contact inspection to prevent corrosion during storage.
Battery warning: If you have a device powered by AA batteries, do not store it with alkaline cells installed. Leakage of the alkaline battery electrolyte can lead to irreparable damage to the contacts, which will require professional service. When choosing AA-powered PVS-14-style night vision devices, opt for the reliable alternative – 1.5V lithium AA battery.
Troubleshooting Matrix for Field vs Service Problems
Problem №1: Device Will Not Turn On
First, ensure battery polarity is correct. Next, try to power the device with a known-good battery. Inspect for corrosion or moisture within the battery compartment, broken battery cap, loose contacts, or missing O-ring. According to the AN/PVS-14 operator manual, a missing, broken, or incorrectly installed battery is the first cause to be considered in troubleshooting activation failure.
For PVS-14-type devices powered by AA batteries, we recommend using quality 1.5V lithium AA battery for field operations. These AA cells provide higher performance in cold weather and will never leak. Cheap alkaline batteries may damage the battery compartment, leading to costly repairs.
In case device won’t turn on with a fresh battery inserted, check the switch position. There should be three definite stops: OFF, ON, and IR. Switch malfunctions can result from physical damage to contacts or the housing. At this stage, you might want to cease troubleshooting and contact your night vision vendor or manufacturer.
Field fix:
- Insert a fresh battery.
- For PVS-14-type units, insert a quality 1.5V lithium battery instead of an alkaline cell.
- Inspect battery compartment for moisture.
- Inspect battery cap, battery compartment O-ring, contacts.
- Clean slightly contaminated contacts.
Send it in for service if:
- Batteries show signs of corrosion.
- Battery compartment contacts appear rusty.
- Switch mechanism is broken.
- Unit remains nonfunctional despite inserting a fresh known-good battery.
Problem №2: Blurry Image
Most blurry images in night vision optics do not mean tube failure. The most common causes are wrong diopter, objective lens misfocus, eye relief misalignment, lens contamination, or fog.
Start with the diopter. Focus on a relatively clear part of the scene or the tube noise pattern and set the eyepiece for the best view of the tube. Afterwards, you will need to focus the objective lens on the object you’re trying to observe. As per the AN/PVS-14 manual, proper focusing of the objective and eyepiece lenses will yield the sharpest possible picture.
When wearing contact lenses or glasses, conduct your diagnostics using exactly those optics that you normally wear to view through your night vision goggles. When eye relief changes with helmet mounts, don’t forget to retune the diopter ring; AN/PVS-14 manual warns that changing eye relief requires diopter calibration.
Field fix:
- Reset diopter to sharp.
- Refocus the objective lens on the observed target.
- Inspect the lens cap, sacrificial window, demist shield, magnifier, LIF, or any other accessory for contamination and ensure they’re securely attached.
- Clean the outer surfaces of all lenses with appropriate optics cleaner and lens paper.
- Let your device acclimate in case it was moved from a cold truck into hot, humid environment.
Send it in if:
- Diopter cannot be tuned.
- Objective focus is not responsive.
- Unable to achieve sharp focus at any distance.
- Cracks or significant scratches, internal fog, deformation seen after cleaning.
Problem №3: The Image Is Too Dark
A dark night vision image can be caused by lack of ambient light, or by reduced gain level. The AN/PVS-14 manual states that image amplification should be controlled via adjustment of the gain. If gain level is lowered, the image will appear dark and unclear.
Check if gain has been changed on your device, or use a dedicated infrared illuminator. The troubleshooting guide of PVS-14 says that activating the IR illuminator will increase the scene’s brightness.
The onboard IR illuminator is designed to provide short-range illumination, and it’s not the best option for long-distance viewing. In addition, most PVS-14 devices use a small onboard IR illuminator, which may not generate enough infrared light for optimal results. Using a standalone IR illuminator is a better choice.
Field fix:
- Raise the manual gain setting, if applicable.
- Move to less dark background.
- Use an infrared illuminator.
- Remove the objective lens cap, if present.
- Inspect battery.
Send in for professional diagnosis if:
- Very dark image regardless of gain setting and lighting conditions.
- Brightness control operates erratically.
- Picture flickers under normal dark conditions.
Problem №4: Image Is Suddenly Shutting Off
Many analog night vision devices are equipped with built-in protection systems. PVS-14 manuals list auto-shutdown caused by exposure to daylight or bright room lighting as one of the most typical malfunctions. According to the troubleshooting guide, such an issue can be resolved by powering OFF/OFF.
If the image shuts off due to approaching headlights, porch lights, weapon lights, or any other concentrated light source, consider this to be a protective response. Move away from the light source, cap your device objective, and power OFF/OFF.
Field fix:
- Move away from the light source.
- Turn unit OFF, wait, and turn ON.
- Use objective lens cap for daylight tests.
- Do not aim at bright light sources unnecessarily.
Send it in if:
- The unit switches off unexpectedly in normal darkness.
- Fails to pass the high-light cutoff test according to its manual.
- Power switch doesn’t bring image back.
Problem №5: Seeing Black Spots
Black spots are common issues in the tubes. The Army night vision manual considers them a cosmetic issue unless they seriously affect usability. According to NightVision.Guide, tube spots are also cosmetic defects with a center zone more important than the edge zone.
As per the manual, tube defects may appear in the form of dark patches of various shapes. The key question here is if the spot is new, big, grows in size, or prevents you from using the device. Minor black spots located in the peripheral areas of the tube usually do not require further action.
Field fix:
- Inspect the external lenses, sacrificial window, demist shield, and the lens cap for contamination.
- Observe the scene in detail, not just a blank wall.
- Compare the tube to the tube spec sheet (if available).
- Photograph the tube with an appropriate through-the-tube technique.
Send it in if:
- Spot appeared after exposure to high lighting.
- It’s large or positioned in the center.
- Black spots grow in number and/or size.
- Internal contamination or moisture suspected.
Problem №6: Bright Points Visible in the Picture
Not all bright spots in night vision are created equally. The Army’s night vision maintenance guide separates emission points from bright spots, where the latter will vanish when blocked from the source of light. Emission points are still visible under such conditions and are likely to indicate a tube malfunction.
Field fix:
- Go to dark location.
- Cover objective lens completely.
- If bright point vanishes, then it’s a temporary artifact of operation.
- Otherwise, stop using your night vision immediately and contact the vendor or manufacturer.
Avoid attempting to solve emission point problems in the field.
Problem №7: Grainy Image or Excessive Noise
Scintillation, sparkles, or “snow” tend to appear more frequently in low-light conditions. Night vision manual for PVS-14 confirms that the effect gets pronounced on tree-covered terrain, moonless nights, within buildings, or observing dark and featureless landscape.
Field fix:
- Turn up manual gain if present.
- Move into brighter conditions.
- Lower manual gain if needed.
- Test outside to get accurate tube evaluation.
Send in if:
- Increased snowiness occurs suddenly under identical conditions.
- Flickering occurs.
- Flashing and cutting out of the picture under normal dark conditions.
- Dramatic difference between tubes when observing a scene through a binocular.
Problem №8: Fog or Haze Appears in the Tube
Fog can appear outside of the device as moisture on lenses, demist shield, eyepiece, and accessories. Moisture in the housing and battery compartment can cause rusting and corrosion during storage. Therefore, the AN/PVS-14 and Armasight manuals emphasize the importance of drying your monocular, mounting system, and other accessories before storage.
Field fix:
- Wipe all exterior moisture from the monocular.
- Let your device acclimate in dry conditions.
- Use a demist shield.
- Keep device dry during transportation and before storage.
- Avoid opening the case in rainy conditions, unless absolutely necessary.
Send it in if:
- Haze inside the optical path.
- Image doesn’t clear after cleaning external components.
- Signs of water intrusion.
Problem №9: Helmet Mounting Is Loose or Out-of-Alignment
When your image starts shifting while moving, the cause may be related to the mounting system or helmet assembly. Per the PVS-14 troubleshooting tables, it’s recommended to check for problems with the helmet mount socket, latches, buckles, fasteners, and dirt on them.
Field fix:
- Ensure that mount is fully tightened and locked.
- Remove debris from the helmet mount socket and latch.
- Tighten mount and helmet screws.
- Adjust eye relief and tilt.
- Retune diopter after changing eye relief.
Send in for service if:
- Latch is damaged or not working.
- Arm fails to lock.
- Mount fails to lock onto the helmet.
- Device loosens when worn on helmet.
Problem №10: No IR Illumination Observed
IR is invisible to the naked eye, and you will need a night vision device or an IR-compatible camera sensor to confirm the presence of the IR light. In a dark area, turn on your night vision, activate the IR, and check if the picture gets brighter. This is the standard approach described in PVS-14 troubleshooting guides. No illumination may indicate either a battery failure or malfunctioning IR switch.
Field fix:
- Use fresh battery to power the device.
- Confirm IR mode engagement.
- Check IR illumination at close distances.
- Use known-working external IR illuminator to determine if the problem lies in the tube or illuminator.
Send in if:
- IR indicator lights up but no illumination detected.
- IR switch is damaged.
- IR does not function with fresh batteries installed.
Time to Get Professional Attention
Stop your diagnostics if you see any of the following problems: image shading, edge glow, random or excessive flickering, tube fog, corrosion, broken controls, persistent emission point, or anything else that cannot be fixed with the above tips.
Your night vision tube and optics, power supply, purge, and seals are a complex system. All field diagnostics should remain external: settings, batteries, focus, lenses, mounts, storage, and accessories.
Night Vision Troubleshooting Checklist
Prior to a hunt, range night, or any training:
- Insert a fresh lithium 1.5V battery for AA-powered units.
- Don’t store night vision goggles with cheap alkaline batteries installed.
- Do not leave battery compartment unattended for a long time.
- Power-on the night vision device in a dark location.
- Confirm diopter and objective focus.
- If present, confirm manual gain range.
- Test the IR illuminator.
- Check if helmet mount is locking properly.
- Use proper optics cleaners only.
- Inspect the lens cap, sacrificial window, demist shield, and any other accessories for contamination.
- Pack spares – extra lithium AA battery, proper lens cloth, external IR source.
Most night vision issues can be resolved by following the simple tips provided here. Some common mistakes that cause unnecessary repairs include exposing the tube to bright light, storing device with open compartments, forgetting about batteries in the housing, or tampering with internal optics.
Can You Use a Thermal Scope During the Day? Daylight Use/Sun Safety and Zeroing Tips.
Night Vision Range Explained: Detection, Recognition, Identification, and Real Hunting Distance
How to Set Up an IR Illuminator for Night Vision: Placement, Beam Width, and Field Mistakes