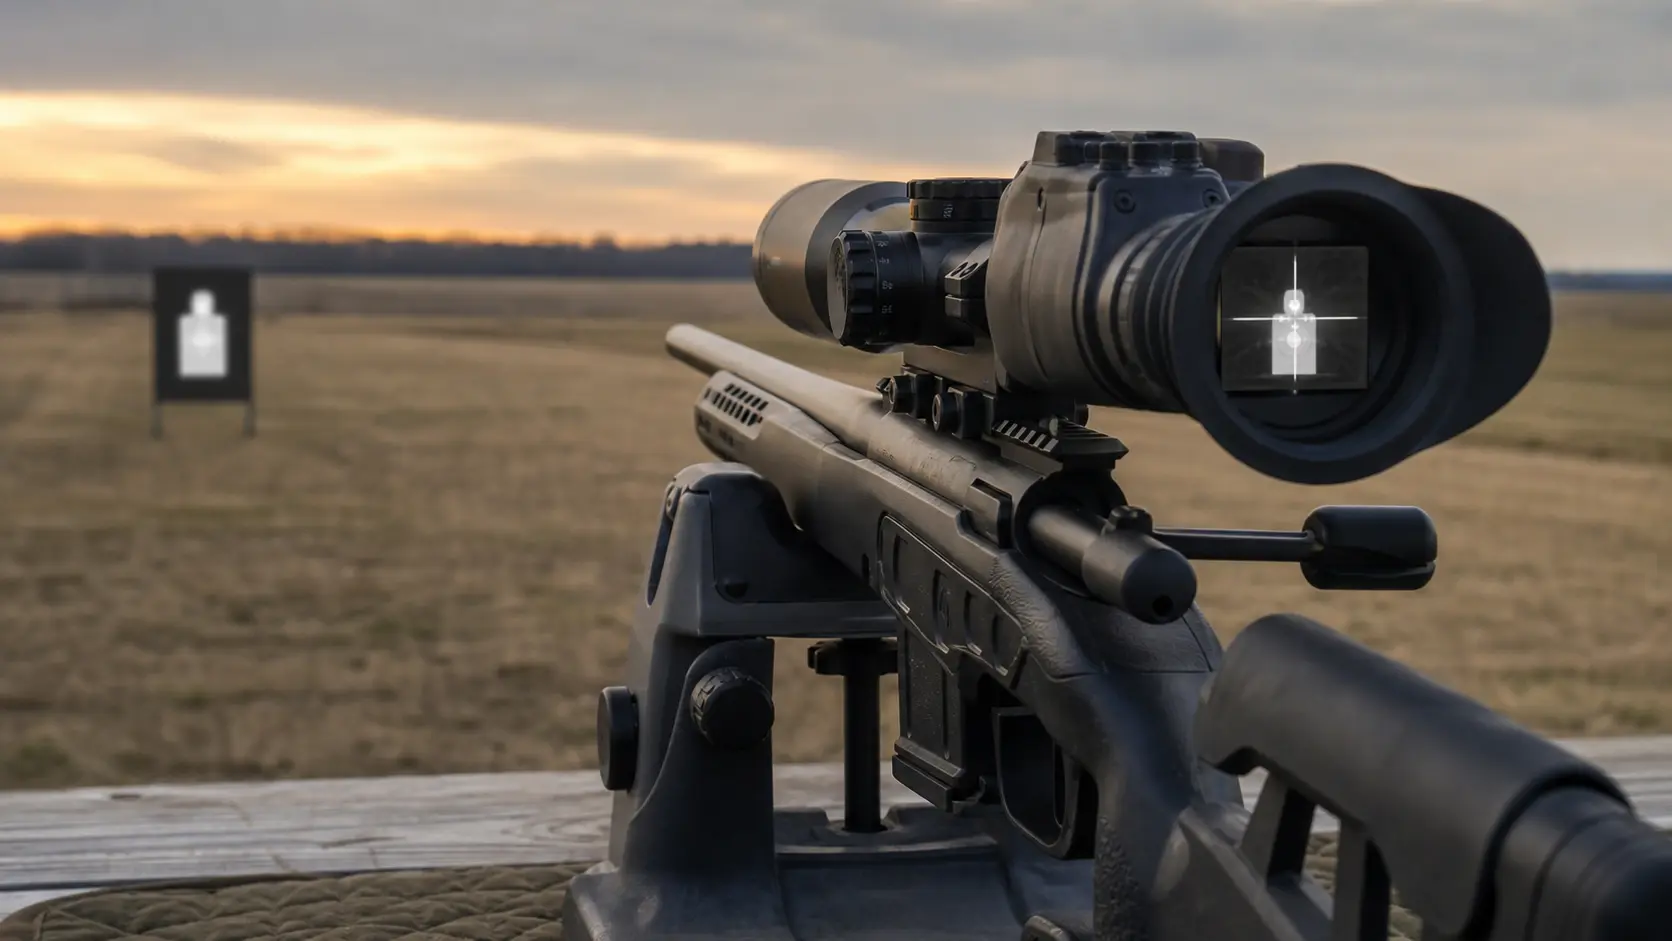
Thermal Scope Reticle and Zeroing Explained: One-Shot Zero, Profiles, Holds, and POI Shift
Thermal scope zeroing is not hard to do but is somewhat different than zeroing a traditional daytime riflescope. A glass scope uses a physical reticle or turret system. A typical thermal scope will display a digital reticle on a processed thermal image and will save “zero” in a profile as software coordinates.
That difference matters. Zeroing a thermal scope is the process of adjusting the digital aiming point to the actual point of impact of the rifle at a known distance. The profile, range, crosshair, ammunition, mount or ballistic data may be incorrect, causing the scope to appear to be in the right spot on the screen but hitting somewhere else.
This guide covers thermal scope reticles, one-shot zero, freeze zeroing, zero profiles, holdovers, ballistic calculators and the most common causes of point of impact shift.
Quick answer
When setting up the scope to zero, the hunter should mount the scope securely, use a good thermal target, set the rifle on a stable rest, confirm the rifle is on paper, take a few shots to make a good group, use the scope zeroing menu or freeze function to move the reticle to the point of impact, save the correct zero profile, and confirm with another group at the range the hunter will be hunting.
One-shot zero is valuable but it shouldn’t be considered a miracle. It can get you close in one round: it freezes the image and slides the digital reticle to the impact of the bullet. Even if it’s a hunting rifle, you should still verify the zero with additional shots, since one hole in the target may have been caused by shooter error, ammunition variation, wind, target error, or movement of the mount.
Source reliability check
This guide does not rely on a single manufacturer or one forum opinion. It uses multiple sources.
There is agreement regarding the basics: thermal zeroing gets the POA and POI on the same line, one-shot or freeze zeroing is a nice-to-have option, profiles need to be saved properly, and confirmation shots are still necessary. The main differences among the different sources lie with the user interface. Pulsar, AGM, ATN, InfiRay and Armasight use different menu names, but the process is similar.
The term “thermal scope reticle” describes what kind of aiming system it is
Most modern thermal rifle scopes use a digital reticle. This is not a reticle etched into glass like a traditional riflescope reticle. The device processes the thermal data, shows it on the screen and also shows a reticle on top of the image.
For this reason, thermal scopes can provide a variety of reticle designs, reticle colors, central or fixed reticle modes, reticle brightness controls, ballistic reticles and a number of stored zero profiles. The optic isn’t actually moving a crosshair within a tube. It is keeping track of a reticle position with respect to the image on the sensor and the point of impact for the rifle.
Thermal scopes have a lot going for them: they often offer the ability to store multiple zeros for various rifles, calibers, suppressors, or ranges. It also generates a common error: users think that it is safe to change a profile, reticle mode, ballistic value or range value. Occasionally it is not harmful. In some cases it alters the aiming solution that you are really using.
What is POA, POI and why it matters
Point of aim (POA) is the location the reticle is aimed at when you break the shot. Point of impact (POI) is the location of the bullet’s actual impact. Zeroing means equalizing POA and POI at a chosen distance.
Aiming at the middle of a thermal target at 100 yards and ending up 2 inches low and 1 inch right means zero is wrong. The reticle is adjusted digitally, or the aiming solution is adjusted, until the reticle and bullet impact match.
The zero value is typically stored in a thermal scope as internal coordinates. In a conventional scope the adjustment is typically performed by moving turrets. In either case, the objective is the same: to ensure that the rifle hits where the reticle tells you it should hit.
Why a thermal scope is different from a daytime scope when it is zeroed
There are five key reasons why a thermal optic feels different when it is zeroed.
First, there needs to be thermal contrast on the target. Thermal may not show a paper bullseye very well. You will require a heat source, a reflective thermal target, foil, tape, hand warmer, commercial thermal zeroing target or another target that can be resolved by the optic.
Second, the reticle is digital. With many scopes, the reticle is moved to the point of impact, rather than a turret being dialed in the traditional manner.
Third, the image is processed. Factors that may influence the clarity of the aiming point and impact mark are focus, palette, contrast, brightness, NUC, and thermal conditions.
Fourth, zooming affects the apparent precision of the adjustment. Some manuals state that the steps in movement of the reticle may vary with different magnifications. Digital zoom can be used to help focus on the target, but excessive digital zoom may result in pixelation.
Fifth, the scope might have more than one profile. When hunting on Profile B after setting Profile A to zero, you may not be hunting with Profile A’s zero.
What does “one-shot zero” mean?
One-shot zero is a function on a thermal or digital scope that allows the shooter to fire one shot, freeze or hold the image, and then use the reticle to move from the point of aiming to the point of impact. The device then moves the digital aiming reference and the reticle should now line up with the rifle’s impact at that distance when saved.
The steps are quite straightforward: focus on a thermal mark that can be seen, take one shot, hold the rifle stable or use the freeze function, enter into the zeroing menu, adjust the reticle to the bullet hole or heat mark, save the coordinates, take one more shot, and confirm.
It’s a bit of a misnomer. One shot is not a full proof of zero, but one-shot zero can yield a viable first correction. One shot does not indicate the actual group center of the rifle. It just gives you the location of one round.
When in doubt, shoot a one-shot zero, then a three-shot or five-shot confirmation group. When the group center is congruent with the reticle at your selected distance, the rifle is zeroed. If a shot is perfect and then the next group walks off, you have another problem.
What is freeze zeroing?
Many one-shot zero systems work because of the freeze zeroing feature. The scope has a freeze feature to allow you to adjust the reticle without holding the rifle completely steady. This is particularly helpful because maintaining precise aim while keeping track of thermal targets, small impacts and digital menus can be difficult.
Freeze zero and one-shot zero are described by Pulsar, AGM, ATN, InfiRay and Armasight. The names may vary but the concept is the same: capture the aiming image, compare it with the frozen image, move the reticle to the hit, save the correction and check.
The best conditions for freeze zeroing are that the rifle is on a solid rest, the target is clearly discernable, the scope is in focus, the sensor is thermally stable, and the shooter does not rush the shot.
The traditional group zero and one-shot zero
The traditional group zeroing method is slower but more reliable. You shoot a group, find the group center, fine-tune the reticle or turret to the group center, and then shoot another group to verify. This method takes into consideration the normal dispersion of shots.
One-shot zeroing is quicker. It’s great for getting on target quickly, particularly if ammunition costs are high or range time is short. However, it will track a poor single shot if the shooter pulled the shot, the target moved during the shot, the rifle was not stable during the shot, or the ammunition was an outlier.
The most suitable practice is a combination of the two. Use one-shot zero with your scope, if possible. Then check with a group. If the group center is off, aim to the group center, not towards one random bullet hole.
Recommended zeroing workflow
Use this for most thermal hunting rifles.
- Ensure rifle is unloaded before attaching or adjusting equipment.
- Secure the thermal scope to a clean rail according to manufacturer’s instructions.
- If your mount has suggested torque values for the mount and rail, then apply these properly.
- Select a gun, a load, a suppressor condition and a zero distance.
- Choose the appropriate zeroing profile prior to shooting.
- Establish a thermal target at a known range, typically 50 or 100 yards for initial zero.
- Center the optic on the target and select a palette that allows the target to be easily centered.
- Use a stable bench, tripod, bags, sled or other solid rest.
- Make one shot to determine the point of impact.
- Zero with one-shot or freeze zero toward impact.
- Save the profile and verify that it states that the coordinates have been saved in the scope.
- Take a 3-shot group.
- If necessary, move to the center of that group.
- Re-check at your actual hunting range.
- Note the profile name, rifle, ammunition, suppressor status, zero distance, and any environmental notes.
Choosing the right zero distance
Optimum zero distance varies depending on cartridge, target size, hunting style and typical shooting distance. A 50-yard or 100-yard zero may be feasible for many hog hunters shooting within 150 yards. Coyote and predator hunters in the open field sometimes prefer a 100-yard zero since shots can be longer and holdover is more critical.
Subsonic ammunition, rimfire, airguns and suppressed short-barrel setups can have a steep trajectory, so be sure to verify at multiple ranges. Don’t choose a zero distance merely because it appears in the scope menu. Choose the distance that corresponds to your rifle and field use. Then check the location of the impact at near and long distances.
Zero profiles explained
Zero profiles are groups of zeroing data that are saved. Depending on the scope, a profile can include distance, reticle position, reticle type, reticle color, ballistic settings, rifle data, and ammunition data.
Profiles should be used when:
- you have one thermal scope to swap between rifles
- supersonic and subsonic ammunition is used by you
- a suppressor can be used when you are either shooting with or without it
- different weights of bullets are used
- you are looking for separate 50-yard, 100-yard or 200-yard zeros
- you have a ballistic calculator on board
Another popular area for errors is the profile. If Profile A is a .223 AR-15 and Profile B is a .308 bolt rifle, then using the incorrect profile can cause the scope to appear to have lost zero. The shooter can be using the wrong saved correction and the optic may be working perfectly.
Label profiles clearly. If it only accepts letters or numbers, write it on your phone or range card. For instance: A1 is 5.56 62gr suppressed 100yd. B1 equals .308 168gr unsuppressed 100 yd. C1 equals .300 BLK subsonic 50 yd.
Type and color of the reticle
Thermal scopes are available in a variety of different reticle designs. For zeroing, it is typically best to use a simple crosshair reticle as it will be easier to center the reticle precisely on the target. Busy reticles may be helpful for a holdover but can complicate small thermal targets and fine zeroing.
Color of reticle is important as well. Usually, white, black, red and green are used, depending on the scope. Certain devices will auto-invert the black or white reticle depending on whether the area behind it is hot or cold. While this may improve clarity, it may also catch out the user who expects the reticle to be similar in all palettes.
The reticle to use for zeroing is the one that provides the clearest aiming line. When it comes to hunting, select the reticle which you can see in a hurry without obscuring too many parts of the animal.
Fixed, central and moving reticles
Some thermal scopes have a variety of different modes for reticles. It’s a matter of central reticle or adjusted reticle behavior, in varying degrees.
In central reticle mode, the reticle can remain near the center of the screen and the image, or the internal correction, corrects the offset. In another mode, the reticle can be off-center when it is zeroed, as the digital correction saved is remembering the reticle off center.
Pulsar manuals say that the reticle may not be aligned with the display when the zero has been performed, and this is fine if there is sufficient reticle movement range. An off-center digital reticle does not necessarily indicate that the scope is damaged. This is just the zero correction that was saved. However, if the reticle is extremely far from the center, it may be a sign of a mounting alignment problem, rail problem, a scope that is on the edge of its adjustment, or a wrong mount.
Holds and holdovers with thermal scopes
A holdover is an aiming point that is applied when the bullet is not going to hit at the zero distance. Your rifle may be zeroed for 100 yards and the target may be further away, so you may need to aim above the point of impact.
Thermal scopes have various ways of coping with holds. The easiest way is just a plain reticle with a known hold. You know, for example, where to aim your rifle at 150, 200, and 250 yards.
The next approach is a reticle with hash marks or BDC references. This can help, provided you verify what these marks mean at your magnification, cartridge and zero distance.
The advanced method is a ballistic calculator. Some smart thermal imagers can offer an aiming solution based on range, muzzle velocity, ballistic coefficient, sight height, zero distance, angle and environmental conditions. This can be strong, but it’s not as precise as the data you input and the zero you verify.
Zeroing is not accomplished by using ballistic calculators
An onboard ballistic calculator is not a substitute for a verified zero. For instance, ATN’s documentation correlates ballistic calculations with stored zeroing profiles and with input variables like zeroing range, ballistic coefficient, bullet weight, initial velocity and sight height.
If the zero profile is incorrect, the calculator is incorrect. A guess of the muzzle velocity means that the calculator may be incorrect. If the rangefinder data is incorrect, the aiming solution may be incorrect. If any of the rifle’s ammunition, suppressor, or mount is changed, there may not be a change in what the calculator says but the bullet may still miss. The ballistic calculator is to be used as a field aid only and not for the purpose of replacing live fire confirmation.
Zeroing thermal targets
The target should be clearly visible in the scope. Using any of the following is a good choice: a commercial thermal zeroing target, hand warmers, heated foil, reflective tape if used properly, black/white contrast targets if exposed to the sun, or a small warm object mounted on cardboard.
The size of the target should be such that it can be aimed at precisely, but it should not be too small to make it difficult to see the center. A large hand warmer can be easily visible but too large for an accurate zero. While a tiny heat mark can be accurate, it can be difficult to locate it after recoil. You can use a commercial grid target to help with the corrections, since it provides a visual reference around the aiming point.
Do not use targets that alter in shape, drop off, melt glue, or create a heat blob that is too big to center. If you are aiming at a fuzzy thermal smear, then your zero will be a guess.
Magnification during zeroing
Digital zoom may be used to help see the target and impact mark, however it can make the image pixelated. The AGM manual suggests that zeroing should be done at base magnification or medium magnification as they are less pixelated and easier to adjust.
As a general guideline, just magnify enough to make a precise shot, but not so much that the object is distorted into a blocky mess. If your scope offers picture in picture you might want to try this option as it allows a larger field of view with a magnified view of the aiming window.
Zero first, then check at actual magnification used in the field. Those who typically zoom in to 3 or 4 times should confirm that the aiming is still logical at that zoom level.
NUC, focus and image settings
NUC, or non-uniformity correction, recalibrates the thermal image. Focus sharpens the target. The visibility of the target and reticle is influenced by the brightness, contrast and palette.
Allow the thermal scope to warm up, carefully focus, and run NUC if the image is uneven or smeared before zeroing. Avoid zeroing on a target that is out of focus. Don’t zero with the reticle disappearing into the target. Avoid using a palette that obscures the impact mark.
Thermal zeroing is in part a shooting task but also an image-interpretation task. Even if the rifle and ammunition are good, if the image is poor, the zero can be poor.
Some of the most frequent causes of POI change include
POI shift is the term used when the bullet no longer hits where the rifle was aimed when it was zeroed. When it comes to thermal scopes, it’s typically not about the sensor. Common causes include:
- loose mount or rail screws
- varying pressure applied to quick detach mount
- changing the scope between rifles without changing profiles
- use of the incorrect zero profile
- changing ammunition
- adding or removing suppressors
- changing barrel temperature
- shooter does not have a good shooting rest or is not able to apply even pressure to the shoulder
- canting the rifle
- wrong ballistic calculator data
- the zero distance is not correct in the profile
- a change in the firmware or settings that influences the active aiming solution
- after zeroing, reticle correction was not stored
- zeroing target error
However, a thermal scope that “lost zero” might be completely normal. First check the profile, mount, ammunition and suppressor status, and saved settings before pointing fingers at the optic.
Types of ammunition and POI vary
Switching between ammunition can alter POI. Various bullet weights, velocities, powder charges, bullet shapes and lots may result in different impact sites. This is particularly noticeable with .300 Blackout subsonic loads as opposed to supersonic loads, but can occur with any cartridge.
Leupold’s rifle scope materials highlight that the same factory loaded ammunition type, weight, and preferably the same lot be used when sighting in. This is the same for a thermal scope. If loads are changed, make a new profile and verify it. Don’t assume that your old zero is still good.
Suppressor POI shift
Adding or removing a suppressor can alter impact due to barrel harmonics, weight distribution, gas flow and sometimes ammunition velocity. On some rifles, the amount of the shift is very slight. Others demonstrate sufficient movement to miss a small target in the dark.
If you hunt suppressed, zero suppressed. If there are times when you hunt without the suppressor, make a separate unsuppressed profile and test it. Until proven, do not assume that the shift is exactly repeatable.
Mount-related POI shift
One of the most frequent causes of zero trouble is mount problems. Unlike a daytime optic, a thermal scope may be heavier and many are mounted on rifles that have recoil, suppressors, tripods, vehicles, and repeated transport.
Inspect rail, base, mount screws, clamp tension and recoil lug engagement. If the scope is removed, be sure that it re-engages the same rail slot. If the reticle correction is taken far from center, check the mount alignment before further chasing zero in the menu.
Quick detach repeatability requires the mount design, adjustment, rail and user consistency to be reliable. Even though the scope electronics are good, a slightly loose QD mount may cause wandering impact.
Barrel effects and temperature
Thermal scopes are for heat, but the bullet is from the barrel of a standard rifle. Point of impact can deviate due to barrel heat, cold bore behavior, thin sporter barrels, suppressors and prolonged shooting. Rifles that walk when hot but group well when they are cold may be a rifle system issue, not a thermal optic issue.
Check cold bore zero for hunting. A coyote or hog shot is typically a first shot from a cool barrel, not the tenth shot in a hot range session.
Clip-on thermals are not the same
A dedicated thermal rifle scope uses its own reticle and zero. A thermal clip-on is designed to mount in front of a daytime optic and maintain the zero of the daytime optic when it is correctly mounted and collimated. It’s a different workflow.
Caution: avoid using thermal scope specific zeroing rules on clip-ons. With a clip-on, the daytime scope is the main aim point. Clip-ons may require verification of alignment, collimation, mount height and repeatability instead of zeroing a digital reticle in the same way.
Troubleshooting checklist
If your thermal scope doesn’t keep zero, then solve the problem sequentially.
- Check that the proper profile is active.
- Check that the distance is zero for that profile.
- Make sure that the reticle correction was stored.
- Check that ballistic calculator mode isn’t unexpectedly moving the aiming solution.
- Ensure that the same ammunition is being employed.
- Check suppressor status is the same as when zeroed.
- Examine mount screws, rail slot position and clamp tension.
- Use a stable rest with a good thermal target.
- Shoot as a group, not one shot.
- Check the confirmation at the actual hunting distance.
- Adjust the zero if the group is close but shifted.
- If the group is large or moving around, look at rifle, ammunition, mount, shooter, and optic.
Hunter’s best practices
The ideal hunting setup is simple for most hunters. Use one profile for each rifle and load. Zero at a working distance. Check with a group. Record the profile. Avoid switching reticle systems and ballistic settings immediately before hunting.
Check zero after travel, after hard impact, after taking the scope off, after changing ammunition, and after adding or removing a suppressor. If your scope has one-shot zero, use it for quick adjustments. If you have more than one profile in your scope, be careful. Use verified data with your scope if it has a ballistic calculator. With a rangefinder scope, keep in mind that range distances are only useful once the rifle is zeroed.
Conclusion
Thermal scope zeroing is the process of making a digital reticle match actual bullet impact. The addition of modern features, such as one-shot zero, freeze zeroing, multiple profiles, ballistic calculators and reticle options, makes it quicker and more flexible, yet it also adds settings to manage.
The proper workflow is simply not complicated: mount the scope properly, select the right profile, make use of a visible thermal target, shoot from a stable rest and use freeze or one-shot zero to get close, confirm with a group, save the profile and test at actual hunting distance.
Don’t automatically assume a thermal sensor problem if your POI changes at a later date. First verify the following: profile, mount, ammunition, suppressor, ballistic setting, target, and rifle behavior. Most of the time the answer lies in the setup and not in the thermal image.
Can You Use a Thermal Scope During the Day? Daylight Use/Sun Safety and Zeroing Tips.
Night Vision Range Explained: Detection, Recognition, Identification, and Real Hunting Distance
How to Set Up an IR Illuminator for Night Vision: Placement, Beam Width, and Field Mistakes