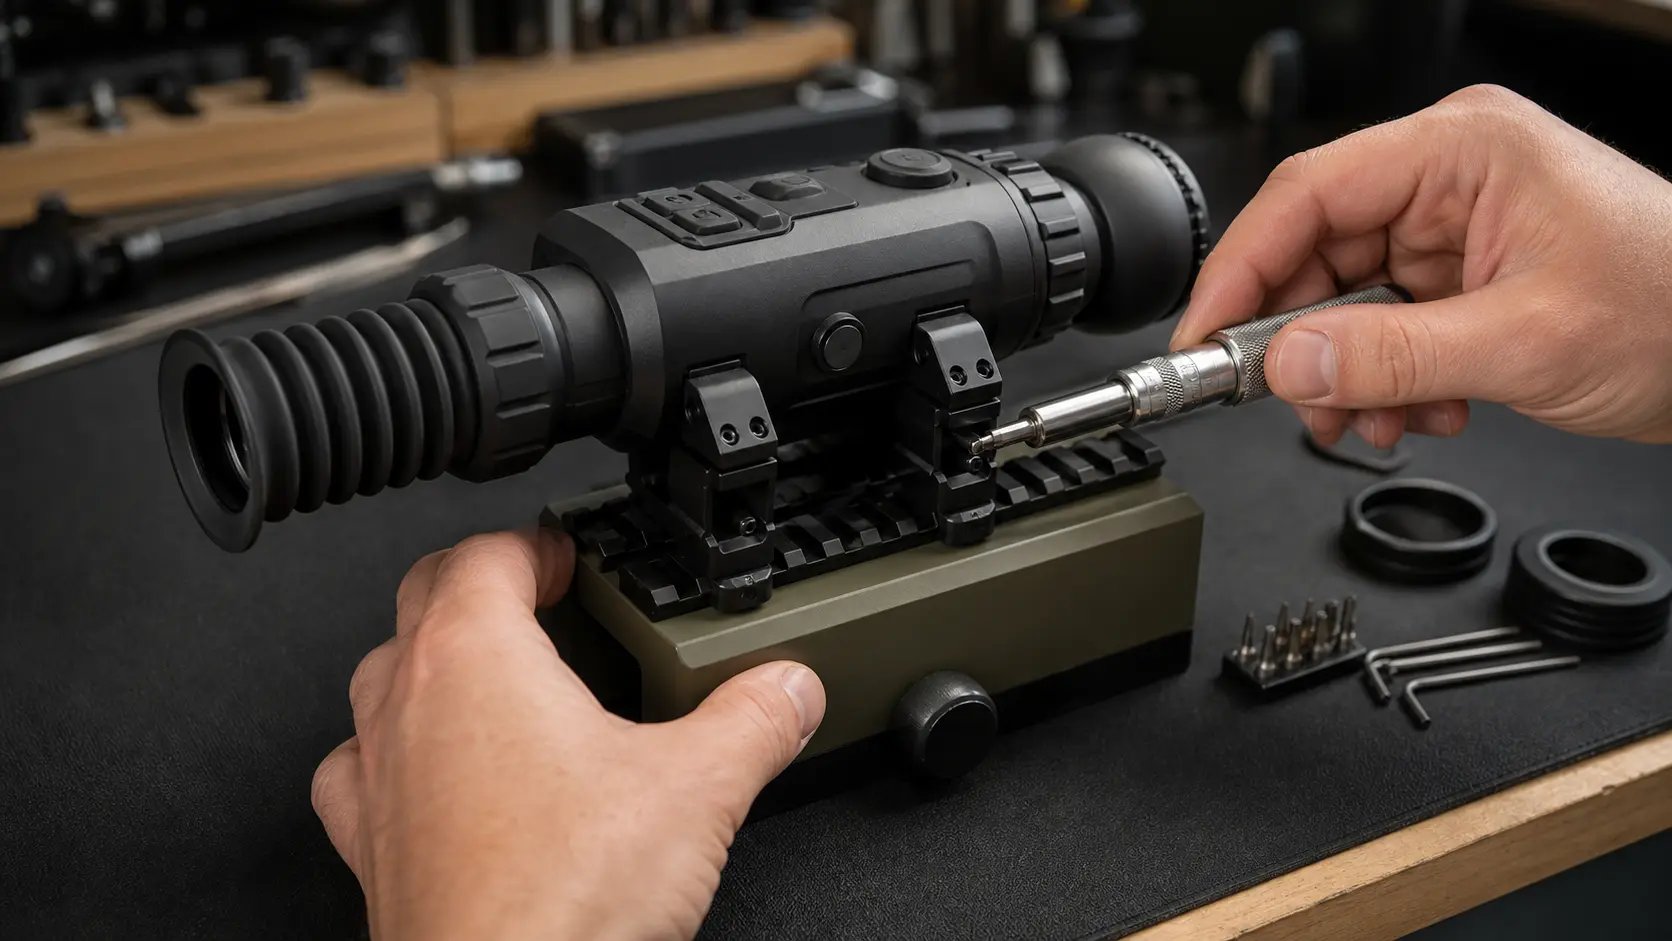
Thermal Scope Mount Height and Cheek Weld: AR-15 vs Bolt Rifle Setup for Night Hunting
In this article, we will discuss thermal scope mount height and cheek weld, and how it affects night hunting with an AR-15 vs a bolt rifle.
Thermal scope mount height is not just a number you take off of someone else’s rifle. It is about whether or not the rifle comes to your shoulder naturally, whether your eye falls on the display without searching and whether your cheek weld is repeatable when wearing real hunting clothes in the dark.
This is an error I often see made with first thermal setups. A hunter installs the optic as if it were a day scope, and is able to see an image at the bench and believes he/she has accomplished their task. Then, the rifle is uncomfortable on sticks, the display doesn’t fit from the tripod, the cheek doesn’t sit right on the stock, or the bolt handle crowds the eyepiece.
It’s not a thermal scope malfunction. It is rifle fit. When it comes to night hunting, the correct setup will provide the hunter with a centered display, a stable thermal scope cheek weld with plenty of eye relief, easily accessible controls, adequate clearance for the action, battery compartment, focus ring, and any QD levers or accessories.
The best mount height for a thermal scope is the lowest practical height that gives you a natural head position, a full centered display, safe recoil clearance, usable controls, and a repeatable cheek weld from real hunting positions.
The ideal height for a thermal scope is the lowest possible height that allows you to maintain a natural head position, full scope visibility in the center of your line of sight, safe recoil clearance, easy access to controls and a repeatable cheek weld from the real hunting positions. AR-15s do not fit the same as bolt rifles. A high set up which is normal on AR-15 can cause your head to be above a traditional bolt-rifle stock.
Start with a natural head position and not a random number.
When considering purchases or changing mount types, first use an unloaded rifle in a typical hunting stance. Using the rifle, shouldering with eyes closed, placing face on rifle itself, then opening eye behind scope.
The height is near if the display can be viewed without lifting, crawling or rolling the head. If your chin comes up off the stock, the thermal scope may be too high. If your face is mashed down or you need to tilt your head to view the entire screen, it may be too low or out of position.
Typically, AR-15s can tolerate higher thermal mounts better than bolt rifles.
An AR-15 stock is more in line with the bore and receiver rail. That is why common AR optics are generally positioned higher than traditional hunting rifle scopes. If you are shooting upright or using a tripod, the headset or more heads-up position, then a slight increase in height with a taller mount or thermal scope mount riser might make sense when using a thermal scope on AR-15 platforms.
However, more is not necessarily better. Without stock contact, you sacrifice speed for lack of consistency.
The fit of bolt rifles often requires a bit more attention to cheek weld.
Traditional bolt-rifle stocks typically feature a lower comb that accommodates lower mounted daytime glass. If a thermal is added with a big eyepiece, big housing or Picatinny rail, the optic centerline can be raised above the level that the stock was designed to accept.
That’s where a thermal scope cheek riser or adjustable comb will make a difference over a higher mount. If you are using a bolt action thermal scope, it may be necessary to move the stock toward your face rather than move the optic further.
Thermal scope fit feels different from daytime glass.
Thermal scopes are digital, but do not overcome poor rifle fit. When you are not looking into optical glass, you don’t see the display through it the same way, but eye position still determines the rate at which you see the display, and how comfortable you are with it.
This is a digital display.
A thermal optic has a screen displayed within the eyepiece. That screen can be used even if your head position is poor. The issue manifests itself later as slow target acquisition, inconsistent view through the thermal scope eye box, neck strain and poor follow-up shots. The idea is to view the complete display at once and from a steady head position.
The Housing, Battery Compartment and Controls may shift mount position.
Thermal scopes are usually shorter, weightier and bulkier than their daytime counterparts. Consider battery caps, focus rings, menu buttons, USB ports, QD levers, objective housings, etc. A thermal scope mount setup can pass a bench check with the following issues: Focus ring blocked, charging handle crowded, bolt obstruction, and battery cap difficult to open.
Night hunting will punish awkward rifle fit.
All the good stuff goes away at night! Gloves, sticks behind you, tripod or leaning on a gate. Coyotes will NOT wait while you are searching for the display. A good thermal scope for night hunting should appear in the same manner each time; this will allow for a positive identification, a backstop and a rifle that isn’t fighting.
There are 4 fit checks to make before your buy a Riser/New Mount.
Do these checks with the rifle unloaded and pointed in a safe direction. Always follow the hardware and optic mount manufacturer’s instructions when adjusting hardware, rather than guess on torque or clamp tension.
Are you able to read the entire display without lifting your head?
Mount the rifle as if it were being mounted on a stand. Move your head to see if the image is a partial circle, shadowed edge or cramped screen, which indicates that height or fore/aft position is incorrect. You can easily find a stable thermal scope eye box and not break cheek position.
Is Your Cheek Weld Repeatable?
A cheek weld is when your face is in the same position against the stock every time. A chin weld just involves your chin touching. Floating head indicates a head above the stock. The thermal scope cheek weld doesn’t need to feel like your deer rifle, it does need to be repeatable.
Is there Eye Relief Safe, Under Recoil?
Mount height is not a substitute for proper thermal scope eye relief. There still must be sufficient room for the rifle, the cartridge, the shooting position and the recoil level.
If you want to get into the details, check out USA Night Vision’s article on thermal scope eye relief.
Are Focus, Buttons, Battery and QD Levers accessible?
Avoid developing a set-up that will operate only with bare hands at the bench. Test the focus ring, menu buttons, battery compartment, charging handle, bolt and thermal scope QD mount lever with gloves.
AR-15 Thermal Scope Mount Height
The AR-15 thermal scope mount height is more flexible than a bolt rifle, but this makes it easy to mount it too high.
Common AR-15 Setup Priorities
An optic is attached to a flat-top receiver rail, the stock is level with the receiver and the rifle is typically used standing, tripod, sticks or off a vehicle. That translates to a moderate or slightly higher optic line that is usable for many hunters.
The priorities in practice are:
- Maintain mount to the stable upper receiver rail.
- Keep charging handle clear.
- Be sure to center the display from your actual shooting positions.
- Maintain sufficient cheek contact for recoil control and repeatability.
- Ensure focus ring, buttons and battery access are available.
To learn more about the complete mechanical mounting process, please refer to USA Night Vision’s instructions on how to mount a thermal scope.
If a Riser is necessary on an AR-15.
A thermal scope riser may be necessary if an optic is too low to be in a natural head position, if you use a larger eyepiece which obstructs the stock weld, if you are shooting from a tripod for most of the time, or if you wear headsets, masks, or winter gear that alters the position of your cheek. The fit should be a practical one the riser can feel and duplicate.
When a Riser Makes the Setup Worse.
A riser is the addition that makes the situation worse by having to deal with the "chin weld". If the thermal scope is too high, you could be able to see the screen, however you might lose contact with the stock. While ultra-high setups exist, it is not the standard solution for a first thermal rifle.
Look for the Rail Slot, Cantilever, and Eye position all at once.
It’s not just one variable – height. Placement fore and aft also counts! Where your eye lands is determined by a cantilever mount, choice of rail slot, stock length, eyepiece shape, etc.
Bolt Rifle Thermal Scope Setup
Bolt rifles are the place thermal scope stock fit issues become apparent rapidly. You can have a clean look on the rail and still be struggling for a cheek weld.
Traditional stocks can be too low for thermals.
Many hunting stocks were designed for lower mounted day scope optics. Elevate eye line above the comb by adding a Picatinny rail, rings and/or a proper thermal mount, and a higher digital optic. This is why it is sometimes necessary to use a cheek riser, adjustable stock or alternative mounting system for a bolt action thermal scope setup.
The rifle is not fitted if your cheek does not touch the stock when the display is centered.
Cheek Risers and Adjustable Combs
If the scope’s height is set correctly for clearance, but the stock is too low for your face, typically a thermal scope cheek riser will be the cleanest solution. Strap-on risers, stock packs, foam test pieces and adjustable combs allow you to test the fit prior to permanent stock work.
Important factors are the bolt throw, ocular housing and port clearance.
Thermal eyepieces can be large and cumbersome. Rotate the bolt hard, (if possible at the shoulder), and see if the bolt handle, your knuckles or the throw lever strike the eyepiece, mount or rear housing. Check loading and ejection is still smooth.
Thermal scope bolt clearance is not something to be found after dark with a round half fed and an animal in the field.
That is a suppressor.
Suppressors alter the balance and shooting posture of a rifle. Recoil is still present with less muzzle report. Maintain safe eye relief, solid shoulder contact and stock position allowing the rifle to recoil straight back. Even a correct weld in the cheek isn’t a substitute for live-fire zero confirmation.
Thermal scope height is easily checkable at home.
There is a lot to learn before leaving for the range with a little open honesty in test fitting.
Use an Unloaded Rifle and Hunters’ Apparel.
Clear the rifle, and get ammunition out of the work area; point in a safe direction. Use a jacket, gloves, hat, headset or face covering that is worn at night.
Hold the rifle as described and repeat this exercise with your eyes closed, then open.
With eyes closed, draw the rifle naturally to the shoulder, bring the cheek down and open the eye. If it’s centered, then you’re on the right track with your mounting height for your thermal scope. The head must not be lifted, lowered or slid when using it: adjust the mount, riser, stock and/or scope position. Do it a few times, it’s important to be consistent.
Assess Test Standing, Sitting, Tripod, Sticks and Bench Positions
Bench comfort is NOT field comfort. Try standing, sitting, kneeling, sticks, tripod, and any position you’ll be using. If one of these positions is the dominant one you hunt, then focus more on that position, but don’t make the others unsafe.
Use gloves and cold weather clothing for testing.
Operate controls wearing gloves. Check focus, cycle bolt/charging handle, work safety and inspect battery access. Position and adjust gear to avoid changes in face position or obstructing a control.
Issues in the field caused by bad mount height.
Commonly, an issue with height will manifest as an issue with speed, comfort or consistency.
Coyotes or hogs feel slow moving in the Scope.
Any configuration that requires continuously looking for the display when the rifle comes up is too slow. It’s hard to hide a bad rifle fit when moving coyotes and hogs.
There is a loss of the display during recoil or follow up shots.
Check the cheek weld, eye relief, shoulder pressure, and the stock position if the picture disappears or changes drastically on recoil. This is different from point of impact shift; it is whether or not your head goes back to the same spot.
You rotate your neck or float your head.
Straining in the neck is a red flag. Hovering over the stock and viewing the screen. A night rifle shouldn’t put you in a precarious situation.
If the rifle fit is the issue, it is the rifle, not the scope.
When the rifle just doesn’t fit behind the thermal, hunters often think the image quality, the eye box or the optic is the problem. Bench testing is performed to compare the display to field conditions and make sure it is not fit but broken.
If it is a true image or function problem, and the rifle setup is not to blame, then follow the thermal scope troubleshooting guide.
There are three terms that are easily confused: Mount Height, Eye Relief and Zero.
Mount height is important but it’s not the answer to all scope issues.
It should be noted that height does not compensate for a lack of proper eye relief.
If under recoil the optic is too close, a centered display is not enough. Adjust the thermal scope eye relief per manufacturer’s instructions and verify from actual shooting positions.
Even with a comfortable setup, it is still necessary to do the proper mounting and zeroing.
A rifle can fit perfectly and still require correct mounting, torque, rail placement, and a confirmation of zero. Refer to optic and mount manuals and verify on a visible thermal target. The USA Night Vision thermal scope reticle and zeroing guide is a handy resource.
Randomly changing height to chase zero problems is a waste of time.
Do not arbitrarily add risers and move the optic if you have a true zero or POI-shift problem. Fit will vary with height and it may be necessary to re-confirm the zero. Analyse separately mounting, rail, ammunition, recoil and profile problems.
Here is some practical buying advice on mounts, risers and stocks.
It’s easier to purchase the proper hardware when you know the issue.
Make sure you select a mount that corresponds to the rifle and thermal body.
Fit a mount with the optic body, tube size or base, rifle rail, and recoil level. Read scope and mount manuals. Ensure that the mount is engaged to sufficient rail, it clears the action, and the optic won’t be obstructed by controls.
Cheek Risers will not correct poor mount choice, they will correct stock fit.
Cheek riser is a stock fit tool. It’s supposed to get your face to the rifle once the optic has been set. A riser can be a must for a bolt rifle. It may not be necessary on an AR-15 as it is already a high optic line.
If you are not having a valid reason, do not go for Ultra-High Setups.
The high mounts can be used for helmets, masks, tripod shooter or body mechanics. They are also known to decrease cheek weld and increase close range offset. If you’re not able to describe why you need the extra height, begin less complicated.
When it comes to the setup, keep it simple for a first thermal rifle.
For a first thermal rifle, it’s usually best to go for simplicity: solid mount, natural head position, safe eye relief, readily accessible controls and confirmed zero. Only add risers, adjustable combs or QD systems when they address an actual need.
Pre-Hunt Fit Checklist
This is what to do before you consider the rifle for night hunting:
1.Before inspection and adjustment rifle is unloaded and safe.
2.Scope installed according to the manufacturer’s instructions.
3.Centered display with a natural head position.
4.Cheek weld repeatable from field positions.
5.Safety of eye relief is verified with a realistic recoil posture.
6.Focus, buttons, battery, recording controls and QD levers are accessible.
7.Clearance of the bolt or charging handle verified.
8.Testing of Stock, Cheek riser, Sling, tripod and clothing.
9.If the scope stores multiple profiles then correct zero profile selected.
10.Zero Confirmed live fire on a visible thermal target before hunting.
Final Recommendation
The answer to what height to mount your thermal scope is that it would be the mount height that makes the rifle fit you and you can use it in the dark. For an AR-15, it can be a higher head position, while still maintaining cheek contact and access to the charging handle. With a bolt rifle, it can sometimes refer to scope height adjustment and having a cheek riser or adjustable comb that prevents your head floating above the stock.
Don’t purchase a thermal scope mount riser because other hunters use them. Avoid a low mount, if it is difficult to center the display. Use a natural mount, repeatable cheek weld, safe eye relief, clear bolt or charging-handle movement, and gloved controls.
A thermal rifle is night hunting ready when it comes to the shoulder the same way each time, displays the full image ASAP and protects your face and eye from recoil and has been tested with live fire before the first stand.
Can You Use a Thermal Scope During the Day? Daylight Use/Sun Safety and Zeroing Tips.
Night Vision Range Explained: Detection, Recognition, Identification, and Real Hunting Distance
How to Set Up an IR Illuminator for Night Vision: Placement, Beam Width, and Field Mistakes