
PVS-14 Night Vision: The Complete Civilian Guide
The AN/PVS-14 has been the U.S. military’s standard-issue monocular since the late 1990s. Over 300,000 units are in active service across all branches. That kind of track record is why it remains the default recommendation for civilian buyers who want a serious Gen 3 device — not because of marketing, but because the design has been tested in conditions most other NV hardware never sees.
Before you spend $2,500 to $4,500, though, you need to understand what separates a good tube from a mediocre one, why the PVS-14 format works the way it does, and what the accessories actually cost once you’re running the device in the field. For a broader look at the monocular category first, the NV goggles buyer’s guide covers how the PVS-14 fits alongside binoculars and goggles.
What the PVS-14 actually is
The PVS-14 is a monocular — one tube, one eyepiece, roughly 1x magnification with an optional 3x afocal lens in front. The housing accepts a standard Gen 3 18mm image intensifier tube. Body weight without batteries is about 390 grams. It runs on a single AA battery for 40+ hours. The design has three operating modes: head-mounted via J-arm or bridge, hand-held, and weapon-mounted.
The form factor is deliberately versatile. You can clip it to a helmet for hands-free movement, hold it up like binoculars for spotting, or mount it behind a weapon optic using a PVS-14 objective adapter. That flexibility is what makes it so widely used — you’re not locked into one role. A quality thermal monocular does some of these jobs better, but no single thermal unit covers all three modes as well as a PVS-14 for the same price. The Gen 2+ vs Gen 3 guide goes deeper on when thermal makes more sense than intensified NV.
Gen 3 tubes: L3, Elbit, and Photonis
The image intensifier tube is the most important component, and most of the price variation in PVS-14 units comes down to tube manufacturer and grade. Three names come up constantly:
L3Harris (formerly L3 Technologies) — domestic U.S. manufacturer. Their tubes have been the baseline for military contracts for decades. Available in a wide FOM range depending on grade. Generally reliable, good availability through authorized dealers.
Elbit Systems of America — Israeli-origin technology, manufactured domestically for the U.S. market. Many users find Elbit tubes have slightly less halo around bright light sources compared to L3 at equivalent FOM. Photocathode sensitivity tends to be consistent batch to batch.
Photonis — French manufacturer. Their XR-5 and 4G tubes are technically Gen 2+ by U.S. classification but perform close to Gen 3 in most practical conditions. Lower purchase price, not subject to ITAR export restrictions. The tradeoff is slightly lower signal-to-noise ratio at very low light levels. For hobbyist use and casual hunting, the price-to-performance is acceptable. For dedicated low-light work, most experienced users still prefer US Gen 3.
For a full breakdown of these manufacturers and others in the night vision space, the NV brands guide covers each company’s product lines and reputation in detail.
Reading tube specs: FOM, SNR, halo, and EBI
Every Gen 3 tube has a data sheet. When you buy from a reputable dealer, you should receive that sheet. Here’s what the numbers mean in practice:
FOM (Figure of Merit) = resolution in line pairs per millimeter multiplied by signal-to-noise ratio. A FOM of 1,800 is solid civilian-grade. FOM 2,000+ is premium territory. Military procurement has historically required 2,000+ for new units.
Signal-to-noise ratio (SNR) — more directly affects low-light performance than resolution. An SNR of 25+ is good. SNR of 28+ is excellent. A tube with FOM 1,800 achieved via high resolution but lower SNR will look sharper in moderate light but fall apart in near-total darkness compared to a tube that hits the same FOM through higher SNR. If you’re choosing between two tubes with similar FOM but different SNR and resolution breakdowns, prioritize SNR for hunting and security applications.
Halo — the bloom around bright light sources: streetlights, flashlights, fire. Some halo is unavoidable with image intensifiers. Auto-gated tubes, which all modern PVS-14 units include, reduce halo significantly. Halo diameter on the tube data sheet is listed in millimeters — smaller is better. Tubes with large halo specs become difficult to use in suburban or semi-rural environments with ambient light sources.
EBI (Equivalent Background Illumination) — lower is better. This is the tube’s internal noise floor. A high EBI means the image looks grainy even in complete darkness, which matters if you’re hunting or working in very dark environments. Most Grade A tubes have EBI below 2.5; Grade B can run higher.
Quick tube grade reference
| Grade | Typical FOM | SNR range | New unit price (complete PVS-14) | Common use |
|---|---|---|---|---|
| Grade B | 1,000–1,400 | 19–23 | $1,500–2,000 | First device, budget, decent ambient light |
| Grade A | 1,400–1,800 | 23–26 | $2,200–3,000 | Hunting, property security, all-condition use |
| Premium / near-Mil | 1,800–2,100 | 26–30 | $3,200–4,500+ | Demanding use, near-zero ambient light |
Civilian units vs. military contract surplus
Military contract surplus PVS-14s show up for sale regularly, typically priced $1,500 to $2,200. The appeal is obvious — you’re getting the same housing for less money. The problem is tube condition. Surplus units have unknown usage hours, possible impact history, and no tube data sheet. You’re buying blind on the most expensive component.
New civilian units from authorized dealers come with the tube data sheet, manufacturer warranty, and often hand-selected tubes that meet specific minimum specs. The premium over surplus is real — usually $800 to $1,500 more — but you know exactly what you’re getting. Most serious buyers who plan to actually use the device choose new commercial units for this reason.
If you do buy used, the minimum checks are: request the tube data sheet, look through the device in a dim room for blemishes and uniformity, test the auto-gating by pointing briefly at a light source and back into darkness (response should be immediate), and check physical condition of the diopter ring and objective lens thread. A blemished tube is not necessarily unusable — it depends where the blemish sits in the image — but you should see it before you pay for it.
ITAR: what it means for civilian owners
U.S.-made Gen 3 image intensifier tubes are controlled under the International Traffic in Arms Regulations. This comes up frequently and is worth understanding clearly:
- Domestic ownership is fully legal for U.S. citizens. There is no license or registration required to own a Gen 3 PVS-14.
- You cannot take a US Gen 3 device out of the country without an export license. This includes Canada, Mexico, and all other destinations.
- Selling a Gen 3 device to a non-U.S. person on U.S. soil requires proper licensing depending on circumstances.
- Photonis and non-US Gen 3 tubes (like those in some AGM products) are typically not ITAR-controlled, making them practical for international travel.
For most domestic users — hunters, property owners, outdoors enthusiasts — ITAR has zero effect on your daily use. It only becomes relevant if you travel internationally with the device or resell it. The underlying technology overview at nvguideusa.com explains why Gen 3 photocathode technology is export-controlled and how the licensing system works.
What you’ll spend: price ranges for 2026
- Entry-level Gen 3 PVS-14 (Photonis XR-5 or low-FOM Gen 3): $2,500–$3,000
- Mid-grade Gen 3 (FOM 1,600–1,800, L3 or Elbit): $3,000–$3,800
- High-grade Gen 3 (FOM 1,800–2,000+, hand-selected): $3,800–$4,500+
For most civilian applications — hog hunting, property security, hiking — a mid-grade tube in the $3,000–$3,500 range is entirely adequate. The incremental improvement from a FOM 2,000+ tube over a FOM 1,800 tube is real but relatively small in field conditions. Where it matters most is in near-zero ambient light with no moon and no artificial light. For a cost breakdown of the sub-$3,000 range, the NVGs under $3,000 guide covers your options at each price point.
Essential accessories and what they cost
The PVS-14 housing alone is not enough for practical field use. These accessories are not optional if you want to run the device effectively:
J-arm mount — the standard single-arm head mount. Connects to a helmet or cap mount and positions the monocular in front of one eye. Cost: $150–$300 depending on manufacturer. Wilcox and Norotos make the most commonly used versions. The Norotos Titan is a common mid-grade choice that doesn’t require a full-size helmet.
Helmet mount adapter — required to attach the J-arm to your helmet. MICH/ACH-pattern helmets take different adapters than FAST-pattern. Wilcox and Ops-Core make the most commonly used shroud/NVG mount combinations. Budget $100–$250 for the helmet-side hardware. If you’re using a bump helmet or bare skull mount, cap mounts are an alternative at $60–$100.
Sacrificial lens — a flat optical lens that threads onto the objective end of the PVS-14. Protects the objective lens from scratches and debris. Costs $30–$60. Worth having in brush, dense timber, or any environment where the front of the device takes abuse. Buy two and keep a spare in the field kit.
IR illuminator — the PVS-14 has a built-in IR illuminator, but it’s weak. Aftermarket illuminators extend useful range significantly. At the high end, units like the Mawl-DA or Surefire Vampire are purpose-built for this role. At the budget end, a Streamlight ProTac Rail Mount with an IR filter provides useful illumination at about $80–$120. For open terrain hunting, the built-in illuminator may be sufficient. For interior or heavy-cover use, the difference between built-in and aftermarket IR is substantial.
Counterweight — if you’re helmet-mounting, a rear counterweight prevents the front-heavy PVS-14 from pulling your head down during extended use. A purpose-built counterweight pouch with lead shot runs $40–$80. DIY options using a small sandbag work too. Skip this once and you’ll understand why people don’t skip it twice.
Weapon mounting the PVS-14
The PVS-14 can be mounted behind a daytime riflescope using an objective adapter. This lets you use your existing day optic at night by placing the monocular directly behind the scope’s eyepiece. The adapter screws onto the eyepiece thread and holds the PVS-14 objective lens against it.
Cost of adapters: $50–$150, specific to your scope’s eyepiece diameter. Image quality in this configuration is workable but not ideal — there’s some light loss, the image circle is smaller than the full tube view, and parallax behavior changes. For stationary shooting at moderate distances, it functions. For moving or shooting at longer ranges, a dedicated NV scope is a cleaner solution.
The alternative — a dedicated weapon night vision scope like the ATN X-Sight, Pulsar Digex, or a thermal-fronted optic — gives better image quality at the expense of flexibility. You’re buying a single-role device rather than a multi-mode system. Decide whether the versatility of the PVS-14 platform or the image quality of a dedicated scope matters more for how you actually use it.
Maintenance and storage
Night vision tubes are sensitive to overexposure. Auto-gating handles brief exposure to bright light automatically, but sustained exposure — leaving the device on in daylight, pointing at the sun — can permanently damage the photocathode. The cover cap should stay on during the day. Store the device with the cap on. Before each use, confirm the cap is off — obvious in principle, easy to forget in the dark.
Battery discipline matters more than most users expect. Cold weather reduces AA battery performance by 30–40%. If you’re hunting in temperatures below 30°F, carry warm spares and swap proactively. Lithium AAs perform significantly better than alkaline in cold conditions and are worth the extra cost for field use.
The objective lens and eyepiece lens can be cleaned with lens wipes or a lens pen. Avoid compressed air inside the housing. The diopter ring and focus ring benefit from occasional use — if the device has sat unused for months, run both through their full range before relying on them in the field. Most PVS-14 units don’t require any lubrication or other maintenance beyond keeping moisture out.
Where to buy
Authorized dealers are the only reliable source for new units with valid tube data sheets and manufacturer warranties. TNVC, Steele Industries, and Gooningear are among the established names in the civilian market. Buying from unknown eBay sellers or private party transactions is how people end up with tubes that don’t match stated specs.
Ask any dealer for the tube data sheet before purchase. If they won’t provide one, that’s a significant warning sign. For hand-selected tubes, specify the minimum FOM, SNR, and halo specs you want — reputable dealers will pull matching inventory from their stock.
The PVS-14 is not the cheapest way into Gen 3 night vision. But it’s a known quantity with a 25-year track record, a large accessories ecosystem, and resale value that holds reasonably well compared to purpose-built civilian units. If you’re deciding between the PVS-14 platform and purpose-built civilian alternatives, the NVGs under $3,000 guide covers the comparison in detail including the AGM Wolf-14 and Photonis-based alternatives.
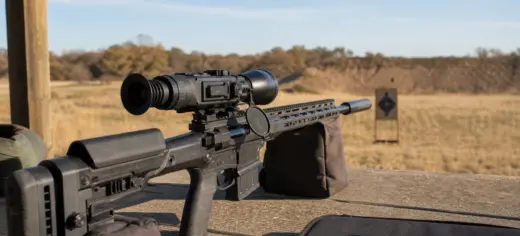
Can You Use a Thermal Scope During the Day? Daylight Use/Sun Safety and Zeroing Tips.
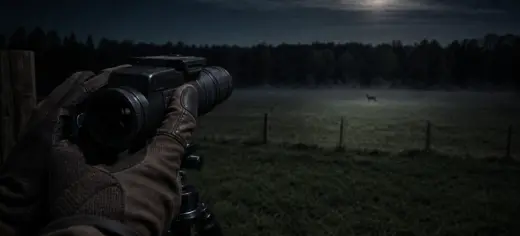
Night Vision Range Explained: Detection, Recognition, Identification, and Real Hunting Distance
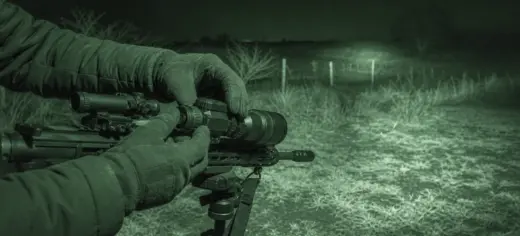
How to Set Up an IR Illuminator for Night Vision: Placement, Beam Width, and Field Mistakes