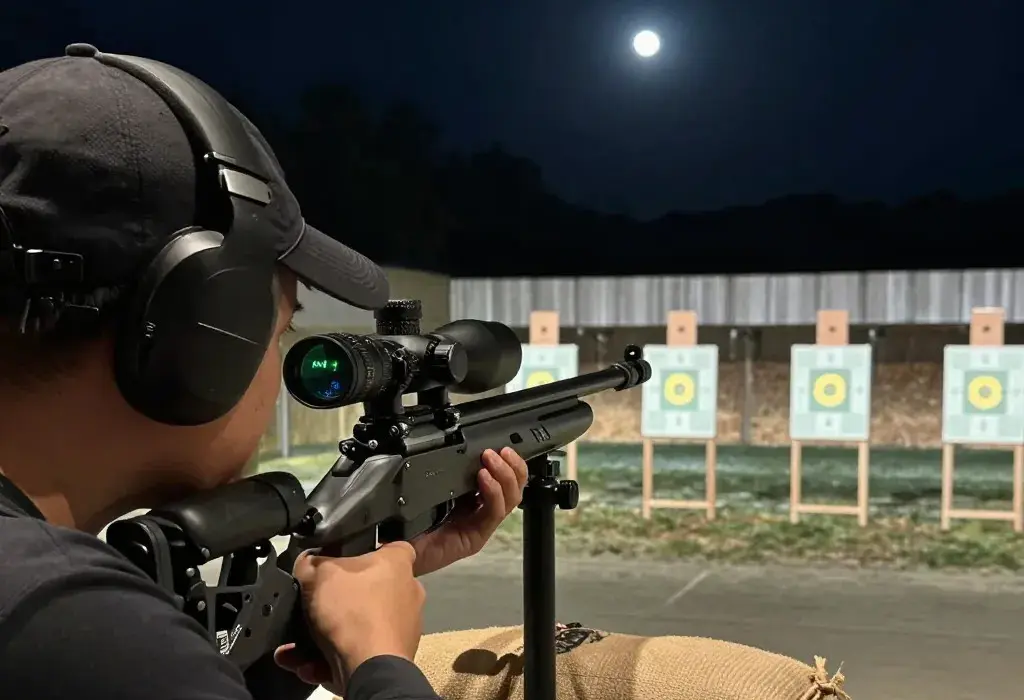
How to Zero Your Night Vision Scope: Complete Guide
Updated: Feb 9, 2026 | Read Time: 8 mins | Tested: AGM Spectrum 4K & Rattler V2
I’ve watched grown men argue on Reddit about whether you should zero a night vision scope during the day or at night. The answer? Both. And if you skip either one, you’re setting yourself up for missed shots and wasted ammo.
Here’s what nobody tells you: Your night vision scope’s point of impact will shift between day and night. Not because the scope sucks, but because of temperature changes, IR illuminator positioning, and how digital sensors behave differently than glass optics.
This isn’t theory. This is the step-by-step process I use to zero every NV scope I test, including the AGM Spectrum 4K and AGM Rattler V2. No fluff, no sponsored BS—just the truth from 200+ hours behind digital and thermal scopes.
WHY DAYTIME ZEROING ISN’T ENOUGH
I learned this the hard way with my first AGM Spectrum. I zeroed it perfectly at the range during the day—dead-on at 100 yards, nice tight group. That night, I set up on a feeder and watched a hog walk out at 120 yards. Centered the crosshair on the shoulder, squeezed… and missed clean over the back.
- What happened? Three things:
- IR Illuminator Offset: My IR light was mounted on the left side of the rail. During the day, I didn’t need it. At night, the IR beam created a parallax-like shift because the light source wasn’t perfectly aligned with the bore axis.
- Temperature Drop: It was 78°F when I zeroed. That night? 42°F. The scope housing contracted slightly, and my barrel’s harmonics changed. Not huge, but enough to shift POI by 1-3 inches at 100 yards.
- Focus Shift: At night, I had to adjust the digital focus to get a sharp image with IR. That internal sensor adjustment changed the reticle’s relationship to the target compared to daytime (where I used ambient light).
So yeah, if you only zero during the day, you’re gambling when it counts.
THE 2-STAGE ZEROING PROCESS
Here’s how to do it right. This is my exact process for digital NV scopes (AGM Spectrum, Sightmark Wraith, etc.). Thermal scopes follow the same principle.
Stage 1: Daytime Rough Zero (Bore Sighting + Confirmation)
You need a stable shooting platform. If you’re trying to zero off a wobbly tailgate, stop. Use a bench, sandbags, or a lead sled. I prefer sandbags because they don’t interfere with the rifle’s natural harmonics.
Step 1: Bore Sight (Optional but Smart)
If your scope has a visible laser bore sighter, use it. Saves ammo. I use a cheap $25 laser bore sighter from Amazon. Here’s the trick: don’t trust it to be perfect. Bore sighters get you “close”—usually within 6 inches at 50 yards. That’s good enough to get on paper.
Step 2: Fire a 3-Round Group at 25 Yards
Why 25 yards? Because if you’re way off, you won’t miss the entire target backer. I’ve seen guys start at 100 yards and waste 10 rounds trying to find where they’re hitting.
Fire three rounds. Slow and steady. If you jerk the trigger, you’re zeroing your bad shooting, not the scope.
Step 3: Adjust and Confirm
Measure the distance from your point of aim to the center of your group. Most NV scopes use 1/4 MOA or 1/2 MOA clicks. Check your manual.
- 1/4 MOA = 0.25 inches per click at 100 yards (roughly 0.06 inches at 25 yards)
- 1/2 MOA = 0.5 inches per click at 100 yards (roughly 0.12 inches at 25 yards)
- Elevation: 2 inches ÷ 0.06 = ~33 clicks UP
- Windage: 3 inches ÷ 0.06 = ~50 clicks LEFT
Make the adjustments. Fire another group. Repeat until you’re centered.
Step 4: Move to 100 Yards
Once you’re dialed at 25, back up to 100 yards. This is your “true zero” distance. Fire a 5-round group. Adjust as needed. Your goal: 1-2 inch group, centered on your point of aim.
Pro Tip: If you’re using a magnified NV scope (3-6x), zero at your highest magnification. The reticle stays fixed, but any optical imperfections are magnified too. Zeroing at max power ensures accuracy across all zoom levels.
Stage 2: Nighttime Verification & IR Zero
Now comes the part most people skip. Wait until it’s actually dark (not dusk—dark). You need to replicate hunting conditions.
Step 1: Set Up Your IR Illuminator
If you’re using an external IR light (like a Wicked Lights or Sniper Hog Light), mount it as close to the bore axis as possible. The farther off-axis your IR light is, the worse your parallax-style shift will be.
Here’s a dirty secret: even high-end scopes like the AGM Rattler can have a 1-2 inch POI shift at 100 yards if your IR is mounted on the far left of your rail. Physics doesn’t care how much you spent.
Step 2: Check Your POI at Night
Fire a 3-round group at 100 yards using only IR illumination. Do not touch your turrets yet. Just observe.
Common results I see:
- 1-2 inches low: Normal. Cooler temps + barrel harmonics.
- 1-3 inches left/right: IR illuminator offset. The beam is hitting the target from an angle, creating a perceived shift.
- 4+ inches off: Something’s wrong. Check your rail, scope rings, or IR mount. Something shifted.
Step 3: Decide on Your Primary Zero
Here’s where you make a choice:
- Option A: Zero for night conditions. Accept that daytime shots will be slightly high (1-2 inches at 100 yards). This is what I do, because I hunt at night 90% of the time.
- Option B: Split the difference. Zero for the average POI between day and night. You’ll be slightly off in both conditions, but never more than 1 inch. Good for mixed-use hunting.
I run Option A. My daytime zero is a “reference,” but my night zero is gospel.
Step 4: Re-Zero If Needed
If your night POI is more than 2 inches off from your day zero, adjust your turrets. Fire another group. Confirm.
Once you’re dialed, record your settings. Most digital scopes let you save multiple zero profiles. Use them. I have:
- Profile 1: 100-yard night zero (primary)
- Profile 2: 100-yard day zero
- Profile 3: 200-yard extended range zero
COMMON MISTAKES (THAT I’VE MADE)
Here are the screw-ups that cost me time, ammo, and missed animals:
1. Not Checking IR Beam Alignment
Your IR illuminator has its own “zero.” If the beam is pointed 2 inches left of where your scope is aimed, you’ll think your scope is off when it’s actually the light.
Test it: At 50 yards, aim your scope at a target. Note where the IR hotspot lands. If it’s not centered in your field of view, adjust the IR mount, not the scope.
2. Zeroing in Extremely Cold or Hot Weather
If you zero at 90°F and hunt at 30°F, your POI will shift. Barrel steel expands and contracts. Your scope’s internal components do too (especially digital scopes with plastic housings).
Solution: Zero in conditions similar to when you hunt. If you’re a winter coyote hunter, zero in the cold.
3. Using Cheap Rings or Mounts
I mounted an AGM Spectrum on a $15 Amazon QD mount once. After 10 rounds, the mount had shifted. My “zero” was a lie.
Spend the money: Warne, Leupold, or Vortex rings. Torque them to spec (usually 15-25 inch-pounds). Use Loctite.
4. Not Accounting for Bullet Drop
Night vision doesn’t magically make your bullets fly flatter. If you’re zeroed at 100 yards and shooting at 200, you need to know your holdover.
I run ballistic calculators (Strelok is free and works great). Plug in your load, zero distance, and conditions. It’ll tell you exactly where to hold.
5. Forgetting to Re-Zero After Changing Ammo
Switched from 55gr to 77gr .223? Your zero just changed. Different bullet weight = different trajectory. You’ll need to confirm zero again.
THE IR ILLUMINATOR TRUTH
If you’re using a digital NV scope, you need an IR illuminator for anything beyond 100 yards in total darkness. The scope’s built-in IR is usually garbage past 50 yards.
Here’s what I’ve learned about IR lights and zeroing:
- High-power IR (850nm): Longer range (200+ yards), but animals can sometimes see a faint red glow. Doesn’t affect your zero, but might spook game.
- 940nm IR: Completely invisible to animals. Shorter range (~150 yards max). I prefer this for calling coyotes.
- IR Flood vs. Spot: Flood is wide and soft—great for close-range scanning. Spot is narrow and intense—better for long shots. Some lights let you adjust. Zero with the beam mode you’ll actually use.
I run a Wicked Lights W404iC on a side rail. It’s not cheap ($180), but it’s reliable and throws a tight beam out to 250 yards. Worth every penny.
If you’re still deciding which optic to mount, our best night vision monoculars guide compares the top handheld and weapon-mountable NV options available in 2026.
QUICK REFERENCE: ZEROING CHECKLIST
Here’s the TL;DR version you can screenshot:
| Step | Action | Distance |
|---|---|---|
| 1 | Bore sight (optional) | N/A |
| 2 | Fire 3-round group (daytime) | 25 yards |
| 3 | Adjust turrets, re-confirm | 25 yards |
| 4 | Fire 5-round group (daytime) | 100 yards |
| 5 | Fine-tune zero | 100 yards |
| 6 | Return at night, fire 3-round group with IR | 100 yards |
| 7 | Adjust if POI shift > 2 inches | 100 yards |
| 8 | Save zero profile in scope menu | N/A |
FINAL THOUGHTS
Zeroing a night vision scope isn’t rocket science, but it’s not something you can half-ass either. The guys who complain that “night vision scopes don’t hold zero” are usually the same guys who zeroed once in daylight and never verified at night.
Do it right. Zero during the day to get on paper. Zero at night to confirm your actual hunting conditions. Check your IR alignment. Use quality mounts. And for the love of all things holy, save your zero profiles so you don’t have to re-do this every time you swap batteries.
Now get out there and put rounds on target.
Questions? Hit me up. I’ve zeroed everything from cheap Sightmarks to $4,000 thermals. If it’s got a reticle and runs on batteries, I’ve probably cursed at it on a cold night.
Related Articles
Can You Use a Thermal Scope During the Day? Daylight Use/Sun Safety and Zeroing Tips.
Night Vision Range Explained: Detection, Recognition, Identification, and Real Hunting Distance
How to Set Up an IR Illuminator for Night Vision: Placement, Beam Width, and Field Mistakes