Thermal Scope Tripod Setup for Night Hunting: Stability, Rifle Clamp, Ball Head, and Field Workflow
Using a thermal scope tripod can give night rifle use a sense of stability, control, and repeatability. If the tripod, head, clamp and body position are incorrect, it can also cause the rifle to be slower, top-heavy, noisy, and awkward.
This is a very common error among hunters of hogs and coyotes. They purchase strong legs, clamp the rifle in, and count on the tripod to correct all misses. The first sounder then cuts across a pasture, the ball head flops or the external battery cable snags, or the rifle is pointing somewhere it shouldn’t while they are scanning.
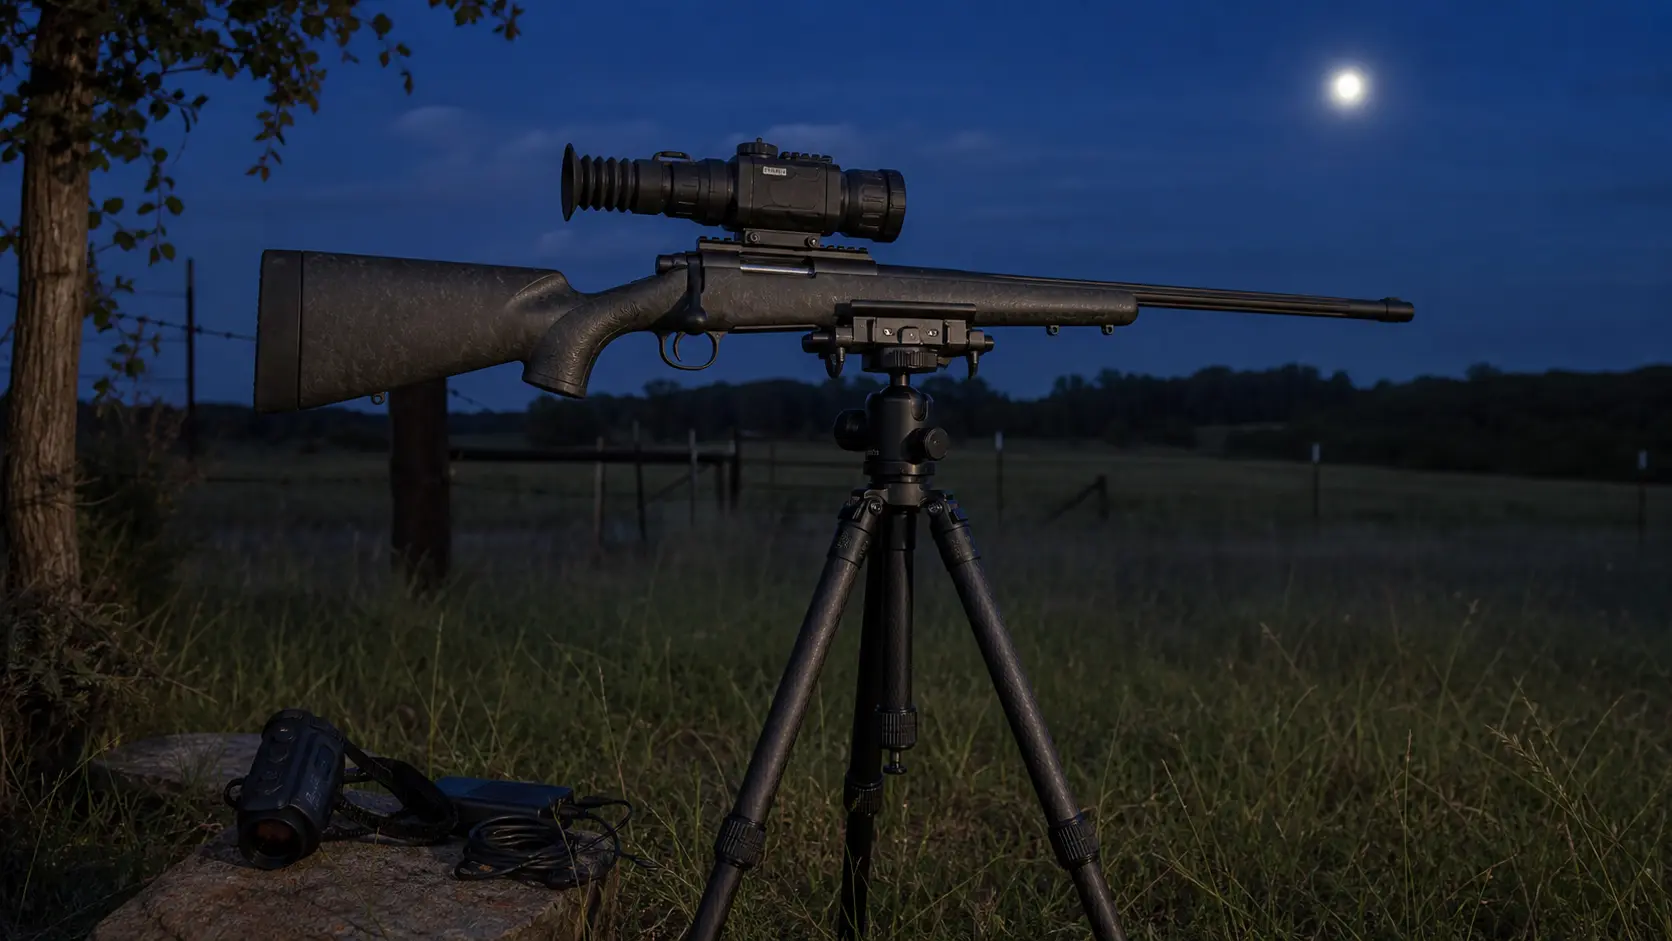
The more proper approach is to consider the tripod as an entire field system: tripod, rifle, thermal scope, suppressor, head, clamp/rail, scanner, batteries, sling, terrain and shooting position. Always unload the rifle, remove the magazine, open the action, and check the chamber before any set up, adjustment, clamping or dry practice.
What are the essential parts of a thermal scope tripod setup?
A good thermal scope tripod setup will be stable enough to shoot from, smooth enough to track animals, quiet enough to set up in the dark, and safe enough that you are not using the rifle mounted thermal as your main thermal to scan with.
The typical hunter setup for most hog and coyote hunters is:
- Tripod legs rated comfortably above the entire rifle with scope, mount, suppressor, sling, external battery and accessories.
- Tripod head that locks securely and doesn’t flop.
- Rifle interface – saddle clamp, Arca rail, direct plate or other supported interface.
- Handheld thermal scanner and rifle set-up, not a workflow based on a scanner only mounted to a rifle.
- Cable routing with no pulling under recoil or pan movement.
- A height that corresponds to the actual shooting position, not a bench-rest position.
When you are hunting in open fields, feeders, pastures, senderos, ranch roads or predator calling stands where you can establish a tripod and remain stationary, it is worth it to use a tripod for thermal hunting. It’s excessive if you’re moving around a lot in heavy cover, climbing a fence or shooting a very quick game where the shooting stick is quicker.
The importance of Tripod Support at nighttime.
Small errors in your setup are magnified at night! Not all the cables, latches, leg angles, sling loops or obstacles can be seen like they can in daylight. Thermal scopes also alter the balance of a rifle. With a mount, suppressor, external battery, and tall optic position, the rifle can get top-heavy quick.
That’s where the thermal hunting tripod head can often make a bigger difference than the legs. Good legs and a bad head is still a bad set up. Too loose = fast until drop. Too tight a head is secure until the coyote starts to move and you can no longer keep it in sight. The objective is a controlled move – sufficient grip to pan freely and smoothly, yet strong enough to ensure clean firing and no surprise flop.
For those who are still in the process of mounting a thermal scope, rail setup, scope position, and clearance, USA Night Vision has its own how to mount a thermal scope guide.
Safety matters here. A rifle-mounted thermal can detect heat, but is not a safe primary scanner. Don’t use a weapon mounted thermal to sweep fields, roads, livestock, gates, buildings or hunting partners. Always use a handheld scanner if possible, point the rifle in a safe direction, and remember thermal detection is not identification. Be aware of the target, what’s around it, and what’s behind it. Don’t night hunt without consulting local regulations.
Tripod vs Shooting Sticks vs Improvised Rest
Shooting sticks are fast, light and handy for mobile predator shooting. They tend to be more portable and faster to move around with than a tripod. The tradeoff is a lack of lateral stability. Coyotes can move around the field or even hogs can run off after the initial shot causing a heavy thermal rifle to wobble on sticks.
Tripods are heavier and slower but are better for long sits, smoother tracking and repeat follow-up shots. A night hunting tripod setup is ideal for feeders, pastures, ranch roads, open fields and fixed calling positions.
Gates, truck mirrors, fence posts and blind windows make makeshift rests which are sometimes effective. Contact with hard surfaces such as a rail, handguard, suppressor, or barrel may alter the rifle’s fit and point of aim/impact. While a tripod won’t automatically alter a zero, poor clamping, inconsistent pressure, loose mounts, or a poor body position can alter where the bullet lands.
If you are looking for a thermal scope for hog hunting, check out USA Night Vision’s guide on the best thermal scope for hog hunting. Coyote hunters may also want to consider using a predator caller and check out use cases from the best thermal scope for coyote hunting guide.
Choosing the Tripod Legs
Don’t compare the tripod capacity to the bare rifle. Include everything in counting: rifle, loaded mag, thermal scope, mount, suppressor, sling, saddle or rail plate, external battery, and cable. Next, select legs and a head that is comfortable margin. Avoid universal claims. It’s your rifle weight and field use that’s important.
Carbon fiber is lighter, but generally more expensive and may be quieter in the event of a bump. Aluminium can be hard wearing and inexpensive but can be harder to grip and louder when it collides with metal gears. Either can work. Weight is an issue for a long walk-in coyote hunting tripod setup. Stiffness and expense may be more important if you are looking for a feeder that is within easy walking distance.
Leg locks are important in the dark. Quiet and compact are the features of twist locks. Flip locks can be quickly and easily verified by touch. Practice with gloves. Ensure that the tripod functions on both standing and sitting and also when kneeling. Many night misses occur because the hunter was setting the tripod for a comfortable standing position, but then had to shoot from a twisted seated position.
Quiet setup is also important. Tape or tie up loose straps. Avoid metal-on-metal clank. A swivel, tripod hook or battery pack should never hit the legs with each move.
The Tripod Head or Rifle Interface is a choice you will make depending on your specific situation.
Head movement is used to move. The interface is the mechanism that connects the rifle. Both matter.
The ball head is the most frequently used tripod for a thermal scope because of its small size and versatility. It is able to pan, tilt and level rapidly. The risk is flop. Too loose a tension and the rifle is top-heavy and the rifle can begin to dip. Before you go out in the field, understand the difference between pan tension, ball tension, and lock tension.
A smooth PT or fluid head will be good for observation/videos but it is not necessarily the best for locked rifle shots. Others are not fast enough to lock, too chunky or lack rifle balance. Here’s the ball head vs pan head hunting tripod compromise: quick and versatile versus controlled, directional ball head.
The saddle clamp is easy to install and works on a variety of rifles. If the rail is not desired, it’s a practical solution. The disadvantage is size and weight. If you over tighten the clamps, the rifle won’t be steered easily and can put pressure on one side.
It’s a matter of rifle when it comes to saddle clamp or Arca rail. If set up correctly, an Arca rail or direct mount can be faster, cleaner, and easier to balance than a clamp. Don’t expect every rail, clamp, plate and chassis system to be compatible. Test fitment with the specific components.
Rifle Height and Body Position are set by the individual.
Your body is your first step in setting up a stable thermal scope. It is easier to stand in tall grass and open spaces but may be more stable sitting or kneeling. Use the same coat, gloves, suppressor, sling and battery pack you use when hunting to test all three positions.
Remember to check natural point of aim before touching the trigger. Get behind the rifle and settle in and close your eyes then open them. Adjust your feet, seat or tripod if the reticle is not close to the target area. Don’t shove the rifle into position and be done with it.
Thermal scopes employ a display, however, cheek weld, and eye position are still critical. The height of the tripod is too high if your head floats. If this is low, you will hunch your neck, and your sight picture will be inconsistent. The height of the mount; the length of the stock; the length of the clothing and the height of the tripod all interact. Head position behind a thermal display is explored further in USA Night Vision’s thermal scope eye relief guide.
If you can’t remain behind the scope for 5 minutes without straining your neck the set-up is incorrect. Shooting positions must be boring, repeatable, and in place prior to the appearance of the animal, especially at night.
Handheld Thermal + Rifle on Tripod: Scanning Workflow.
There are only two things to do: scan with the handheld and shoot with the rifle. A handheld scanner allows for searching without having to point a rifle at everything. It also helps to prevent fatigue. A shouldered rifle is not ideal for prolonged scanning because it makes the neck, arms and decision making suffer.
When scanning, leave the rifle on the tripod and make sure it is pointed in a safe direction. If the scanner detects heat near the left fence corner, gate post, feeder or road bend, first move the rifle to that location. Avoid sweeping entire field with the rifle scope.
This will also help with follow-up shots. The head should be freely mobile to follow a moving coyote or hog and firm enough to hold for a clean shot. If you need to unlock multiple knobs after each shot, then it’s too slow. If the rifle is not able to be stopped cleanly, it is too loose.
In thermal scope field of view explained, USA Night Vision shows you why the FOV changes with magnification and lens size.
Cable clearance, battery clearance, sling clearance and suppressor clearance.
Small things tend to go wrong at night. Common culprits include external battery cables, slings, knobs or suppressor weight.
Run thermal scope cable so it is not over the ejection port, charging handle, bolt handle, focus ring, safety, magazine release or tripod clamp. Leave enough slack for recoil and pan movement, but not enough to make a loop around a knob. The battery life guide of USA Night Vision provides a more detailed look at power planning for long hunts.
A sling can go around a tripod leg without your awareness. Prior to calling, swing the rifle from left to right in the trajectory that you intend to take. Ensure that the sling is kept clear.
The use of a suppressor can push balance forward. This could involve the shifting of the clamp or Arca plate. May also alter the muzzle dip rate if head is loose. Use gloves to handle the charging handle, bolt handle, safety, focus ring, menu buttons and battery door. If the tripod obstructs a control, correct it at home.
Range, Holds, & Shot Discipline From a Tripod
A thermal scope shooting rest can’t compensate for poor range estimation. A steady rest can only improve your repeatable aiming error.
Prior to darkness, mark distances to feeders, gates, tree lines, road bends and terraces. If you have and conditions permit, use a laser rangefinder. Reticle (or stadiametric) ranging may be useful, but do not make a marginal shot based on it alone. USA Night Vision has this discussed in the thermal scope range estimation guide.
Close range offset can also result from tall thermal mounts. At very close distances, your bore and optic line are not the same. Check this at the range, particularly if you are shooting in close areas like around feeders or in narrow ranches.
Pass if identification is not clearly made. If backstop is not clear, pass. If you don’t know what is behind the animal, then pass. But no matter how firm the tripod is, thermal detection is not positive identification.
Pre-Hunt Tripod Setup Checklist
At-Home Dry Setup
- Unload rifle and check clear.
- Attach the rifle to the tripod.
- Check the balance with the thermal scope, suppressor, sling and battery attached.
- Pan as expected.
- Inspect Cable, Sling, Bolt, Charging Handle, Focus and Button Clearance.
- Practice standing, sitting and kneeling positions.
Range Confirmation With Live Fire
- Zero from the tripod, and from your normal field position.
- Shoot Groups NOT a round.
- Ensure that clamp pressure or support position does not alter the point of impact in practical situations.
- Ensure that close range offset and normal hunting distance holds.
Don’t jump to the conclusion that the thermal scope is the issue if recoil or zero retention is an issue – read the article on thermal scope recoil rating Caliber compatibility
Night-Before Battery and Cable Check
- Charge the scope, scanner, external battery, call and phone.
- Check cables and ports.
- If you need external power make sure to pack a spare cable.
- If you use standby or sleep behavior between stands, check this behavior. USA Night Vision has a separate article on thermal scope standby mode/sleep start up time.
In-Field Setup Sequence
- Choose a safe shooting direction and lane.
- Set leg height (before calling).
- Mount rifle and check head tension.
- Check scanners, rifle scopes and batteries.
- Scan with the handheld first.
- Only move to the rifle when a safe lane and a reason exists.
Common Mistakes
The most frequently made error is to purchase strong tripod legs with a weak head. The rifle is carried on the head. When it slips, gets caught or flops, the legs cannot rescue the setup.
Over tightening a saddle clamp is the next error. A higher clamp pressure is not necessarily a good thing. If the rifle has no freedom of motion, you’ll have to fight the rifle.
Another error is when the height is set from a bench rather than from real field positions. In a pasture, bench height is unimportant. Adjust the tripod for the way you hunt.
Cables are a source of much trouble as well. Cable pull may cause a port damage, power interruption or pull the rifle during pan movement and recoil.
The final fault is to fault the optic for a miss due to support and position. When shots move from the tripod, but not from another rest, before accusing the scope, it is time to examine body position, clamp pressure, mount, head tension and range. When support issues begin to resemble optic issues, check out USA Night Vision’s thermal scope troubleshooting guide.
Final Takeaway
The good thermal scope tripod setup will make the rifle safer, more stable, and quicker without any new failure points.
The tripod is not the complete solution. The entire setup comprises the legs, head, rifle setup, body position, scanner procedure, cable management, range etiquette and practice.
Set it up unloaded at home. Test it out at the range. Scanning in field with handheld scanner. Always have the rifle pointing in a safe direction. Understand what you’re trying to do and what you want the background to be. Check local regulations. If you do, a tripod is more than a burdensome accessory. It turns into a repeatable night hunting shooting position.
FAQ
For thermal scope hunting, is there any necessity for a tripod?
Not always. If your rifle is heavy, your stands are long, or your shots are demanding added stability, or you want smoother followup control, then you need a tripod. If the mobile stand is short and the cover is dense, shooting sticks might suffice.
When night hunting, should it be a Ball Head or Saddle Clamp?
They address varying problems. Movement is via a ball head. Rifles that don’t have a direct rail interface can be secured to a saddle with a saddle clamp. Most hunters employ both. If your rifle is equipped with an Arca rail, then a direct Arca rail might be cleaner and faster.
Coyote hunting at night, is shooting sticks all that is required?
They can be, particularly with light rifles and mobile predator calling. The coyote hunting tripod setup is more beneficial where the rifle is heavier, the set is longer, and/or you need smoother tracking.
Is it OK to Scan With My Rifle-Mounted Thermal From a Tripod?
That can be done and is not your main scanning style, but it can be done. Don’t use a weapon mounted thermal to sweep. Use a handheld scanner – it’s safer and less strenuous.
The optimal tripod height for thermal hunting varies by location.
The ideal height is the one that allows a natural point of aim, good cheek weld and a "relaxed" neck in your actual shooting stance. Try to stand, sit and kneel.
Does a TRIPOD change Zero?
Zero doesn’t mechanically change, a tripod doesn’t change it. Practical point of aim or impact can be altered by poor clamping, inconsistent clamping pressure, loose clamping, different support points or body position.
So, for the Thermal Hunting Rifle, would it be wise to use an Arca rail?
If your rifle takes an Arca rail and you are looking for quick and clean tripod attachment, then use an Arca rail. If not, then using a saddle clamp works. Be sure to check compatibility with the actual rail, clamp and rifle prior to hunting.
Can You Use a Thermal Scope During the Day? Daylight Use/Sun Safety and Zeroing Tips.
Night Vision Range Explained: Detection, Recognition, Identification, and Real Hunting Distance
How to Set Up an IR Illuminator for Night Vision: Placement, Beam Width, and Field Mistakes