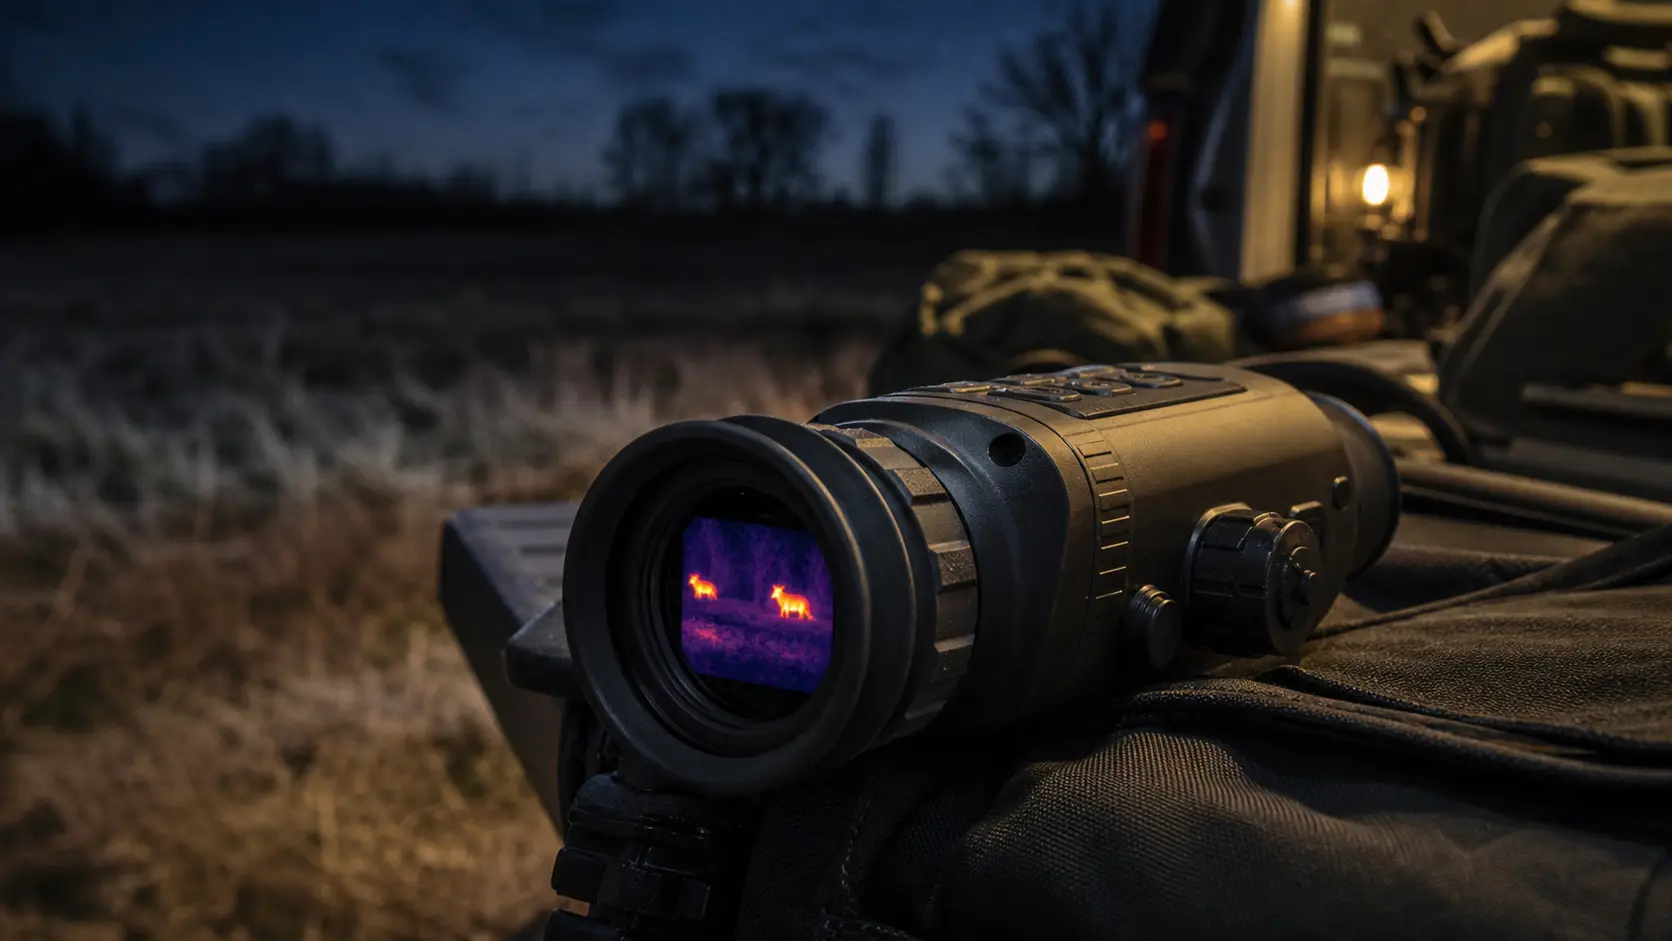
Thermal Scope NUC Explained: Auto vs Manual Calibration for Hunters
Quick Answer: What Is NUC on a Thermal Scope?
There are a number of factors that affect NUC on a thermal scope. Multiple factors influence NUC on a thermal scope.
NUC is not a temperature control device. NUC is an acronym for non-uniformity correction. It assists the sensor in compensating for different responses of the pixels, thermal drift, fixed pattern noise, and image degradation from the difference in optic temperature and outside temperature. If the image freezes for a split second, and then snaps back up clearer, you just witnessed thermal scope NUC in action.
Another term that can also be seen is FFC (flat field correction). In field terms, thermal scope FFC and NUC frequently refer to the same issue – the optic is utilizing a reference point to “flatten” or even out the image. Not all modes are marked the same by all manufacturers; check the manual.
There is a simple lesson to be learned from the hunter. If it’s a small click or freeze, it is usually normal. The key is to understand when to use thermal scope auto NUC and when to use manual NUC or semi-auto calibration and get closer control around a shot opportunity.
Why does a Thermal Scope “Click” or “Freeze”?
A thermal scope is a camera that constructs an image based on temperature differences. The image may appear grainy, streaky, shaded or washed out due to changes of the sensor, housing, lens, electronics, or air temperature. Thermal scope image calibration assists in minimizing that drift.
Some optics can disrupt the image during calibration for a short period of time. Some have an internal shutter or reference surface that may sound a click. Some models may require the lens cap or another even reference scene. This is why there is a difference in the answer to the question of “why does my thermal scope freeze” depending on the model of the scope.
When Freezing Is Normal
When the freezing time is short and associated with calibration and then a better image, freezing is typically normal. Expect it if it happens at start up or when you move from a warm truck to cold air, or when you are scanning for a long time, when the temperature changes outside, or when the image begins to look uneven.
It is typical field use for a thermal scope for hog hunting or a thermal scope for coyote hunting, where you are likely to be sitting for a long time, in varying weather conditions, scanning the area.
Freezing may be a problem when:
If freezes are always present, frequent, or accompanied by error messages, or if the freezes start after impact, exposure to water, battery failure, or firmware problems, refer to the manual or manufacturer support. If it is followed by repeated lockups, black screens or calibration that never ends, do not assume that it is a normal NUC.
NUC is the same as FFC?
NUC is short for non-uniformity correction thermal calibration. FFC is the acronym for flat field correction thermal scope calibration. The manufacturer may implement NUC, FFC, calibration, image correction, refresh, auto calibration, or manual calibration in various ways.
The same field goal, one of cleaning up the image for a more even and easy-to-read display. Ask two questions: Can you control the time the scope calibrates and is the image sharp enough during the hunt?
The Auto NUC comes with its own set of strengths and weaknesses.
Auto NUC: Optic determines when to calibrate. It’s a help for beginners. This removes the necessity for pushing one button every time the picture moves, and lets the scope hold a more stable picture during the scanning process.
Handheld scanning, learning a new optic, watching a field edge, and ranch security are all good uses for auto NUC. Some optics even provide a countdown or warning before auto calibration.
The problem is that there is a time aspect to it. It is safe to freeze for 1 second when there is no motion. A 1 second hesitation when a coyote stops in a gap, when hogs hit a feeder lane, or when a follow-up shot is needed can be very expensive.
When Auto NUC Makes Sense:
Auto NUC should be used when the cost of the slight pause in the image is low, such as handheld scanning, static observation, low pressure stands, and/or long watches where you’re not committed to a shot. It also helps the novice user not to be misled by thinking that the thermal scope image quality is poor when really only a calibration of the optic is needed.
Auto NUC Can Hurt You
Auto NUC is not great during the shot window. One clean coyote may give you pause. The same problem will occur with the hog hunters when the optimal angle at the feeder quickly fades. If you can semi auto or manual time, do so during the critical part of the stand.
The following lists the strengths and weaknesses of the manual NUC.
The manual operation of NUC thermal scope enables you to time it by yourself. It can be a button push, a short cut, a menu command or a lens-cap/external reference step depending on the model.
The benefit is control. Calibrations may be performed before a call, before the animals are in the lane, after a long walk or if the picture appears coarse. Discipline is the negative. The image may be noisier or less even if forgotten.
A list of situations where Manual NUC makes sense:
Manual NUC fits like a glove for experienced users, rifle mounted scopes and predator stands when a surprise freeze is not an option. This is also useful when assessing fine detail prior to identification.
Manual NUC The Risk of Forgetting
Manual mode is the advantage of a routine. Power on the optic, let the optic settle, dial the diopter, focus, run NUC and scan. If the image later becomes grainy, streaky and uneven, try to recalibrate first, and only after that, blame the sensor or lens.
Semi-Auto NUC: The Practical Middle Ground
Semi-auto NUC is frequently the happy medium. For many optics, the hunter begins the process of calibration and then the scope does the rest once instructed. No need to find your way through menus every few minutes, so as not to be surprised.
Semi-auto is a fit for the field when hunting. You can scan as usual, and calibrate at the serious window if you wish, and even calibrate again if the image moves. Try it out prior to the hunt to determine the length of the freeze time and if the model needs a covered lens.
The following Field Comparison Table provides a comparison of Auto, Manual and Semi-Auto NUC.
| NUC Mode | How It Works | Best For | Weakness | Field Advice |
|---|---|---|---|---|
| Auto NUC | The optic determines when to perform thermal scope calibration. | Beginners, handheld scanning, long observation, ranch security. | May freeze at the wrong time. | Use while scanning; be aware if a warning appears on your scope. |
| Manual NUC | Manual NUC by model-specific button, shortcut, menu or reference method. | Predator stands, rifle mounted scopes, experienced users. | Easy to forget. | Utilize prior to calling, prior to shot window and when image degrades. |
| Semi-auto NUC | The hunter initiates the calibration and the optic corrects. | Most field hunting where timing control is important. | Still requires awareness. | It is a great middle ground for hog and coyote hunters. |
| Lens-cap/external calibration where required | Some models require a covered lens, or even a reference scene. | Optics geared toward external reference calibration. | Slower under pressure. | Practice prior to hunting and follow the manual. |
When should hunters run NUC?
Thermal scope calibration should not be considered as a timer. Assume it is field discipline. Always run NUC before stand, before animals enter the shot window, after major temperature changes, when the image looks rough, or before doing any NETD, resolution or lens quality assessments.
If you’re making any other adjustments to the palettes, brightness, contrast and thermal scope focus, do this routine along with the USA Night Vision thermal image settings guide: https://usanightvision.com/blog/thermal-image-settings-explained-2026/.
Before a Hog Hunt
When setting up a feeder, trail or crop field, turn on early and allow the optic to settle. Do NUC prior to serious scanning, and again prior to the movement window if the image has moved. Do not wait until group is under feeder.
Before a Coyote or Predator Stand
Run NUC prior to call time. You don’t want any more surprises when the caller is moving and an animal is closing in. It’s the same type of discipline as outlined in the reticle and zeroing guide: https://usanightvision.com/blog/thermal-scope-reticle-zeroing-explained-2026/.
During Long Ranch Security Scans
Auto or Semi Auto NUC can be helpful for long property scans for which the temperature may not change quickly enough to notice drift without a change in calibration. Aside from that, when you are moving in and out of a warm vehicle, also consider startup, standby, cold weather and battery routine: https://usanightvision.com/blog/thermal-scope-battery-life-guide-2026/.
Does NUC enhance detection or identification?
NUC can help to make images more clean; it doesn’t change the hardware. It offers no real benefits to the sensor, no magnification, no larger lens, no better resolution, no longer range of ethical identification.
What it can do, however, is to even out the image, minimize distracting noise patterns and assist in interpreting the detail the optic already has. This can be important in breaking away a hog from brush or following a coyote through a low contrast field.
NUC is not a substitute for Focus, NETD or Lens Quality.
However, there is no cure for poor focus, weather, lens performance, low sensor resolution and low sensor sensitivity with a clean calibration. Help process all of the image chain: diopter, focus, palette, brightness and contrast, calibration, weather, NETD, sensor size, distance.
For sensitivity and low-contrast weather you can check out: https://usanightvision.com/blog/thermal-scope-netd-explained-mk-sensitivity-hunting/. On Sensor Resolution, check: https://usanightvision.com/blog/thermal-scope-sensor-size-256-vs-384-vs-640-vs-1280/. The difference between smooth motion and calibration pauses is explained in the refresh-rate guide: https://usanightvision.com/blog/thermal-scope-refresh-rate-30hz-vs-50hz-vs-60hz/.
NUC and Weather: Humidity, Cold and Warm Nights are all important!
Low contrast fields, cold fronts, warm humid nights, fog, and wet vegetation may worsen the image issues. Sometimes NUC helps. In some cases the actual limiting factor is weather, focus or the optic.
Humidity is a case in point. Calibration can help to even-out the display, but cannot fix the poor contrast of a damp night. Additionally, the temperature difference between a warm car and a cold gun and the outdoors can become more pronounced. Turn on early and tune up before assessing performance.
Hunters often make common mistakes with NUCs.
You’re thinking the scope is broken because it clicks.
It is normal for a click and some short time in the thermal scope to freeze. When the image freezes and comes back clearer, the optic is probably calibrating.
Leaving Auto NUC On Without Understanding Timing
Auto NUC is useful. Blind trust is the problem. Be aware of when it operates & whether it issues an alert or not, and whether or not it may block the view during a shot window.
The NUC After Startup option is not being set.
Thermal optics must be allowed to stabilise. When you turn on and make a decision about the picture, you could be evaluating an optic before it settles.
When the scope is really just out of focus or calibration, don’t blame resolution.
While NUC can’t make a low resolution optic act like a high resolution optic, it can make any optic look worse if it’s poorly calibrated or poorly focused.
When purchasing a NUC, what are some of the features to consider?
For scope comparisons, see if there’s calibration control that is compatible to your hunting style – auto, semi-auto, manual – quick button access, countdown/warning before auto calibration, clear lens-cap/reference instructions, and a menu you could use in the dark.
With the purpose of calling, time of control is important with a calling rifle. Auto NUC is more accommodative in handheld scanning. For many buyers, the semi-auto variety is the least demanding.
Make sure to consider the system as a whole after NUC, especially if you are comparing auto vs manual NUC thermal scope behavior: lens size, sensor size, NETD, refresh rate, battery, mounting, zeroing and ethical target ID. For setup discipline, see: https://usanightvision.com/blog/how-to-mount-a-thermal-scope-2026/. Range expectations: https://usanightvision.com/blog/detection-vs-recognition-vs-identification-thermal-scope-range/.
Final Field Routine: A simple NUC Checklist.
1. Power ON the optic beforehand.
2. Allow the temperature to equalize with outside temperature.
3. Adjust the diopter for your eye.
4. The object should be in focus, for the distance at which you are observing it.
5. Do not do serious scanning without running NUC first.
6. Use auto, semi-auto or manual for the hunt.
7. If the image appears too grainy, streaky, uneven or washed out, recalibrate.
8. Avoid changing the calibration mode for the first time during a shot opportunity.
9. Check the manual for lens-cap, shutter or model-specific behavior.
10. Should the freezes continue or become long or accompanied by errors, contact support.
The overriding key points about the thermal scope NUC are: Calibrate before it counts, know what the scope is doing, and don’t confuse a normal click with a broken scope. Though a clearer image may make you better able to make the most of the thermal information you bought, it does not replace focus, field judgment, and ethical target identification.
Can You Use a Thermal Scope During the Day? Daylight Use/Sun Safety and Zeroing Tips.
Night Vision Range Explained: Detection, Recognition, Identification, and Real Hunting Distance
How to Set Up an IR Illuminator for Night Vision: Placement, Beam Width, and Field Mistakes